|
tamar
Posts: 804
Registered: 5-1-1989
Location: Gouda
Member Is Offline
Mood: A new beginning 
|
|
posted on 11-2-2013 at 17:15
|

|
|
Pimp(ed) my Porsche (997 GT3 RSR Scaleauto)
Porsche's have been the backbone in the world of Sports car racing ever since the original 911, hit the tracks.
Be it the efficiency of its flat six power, or just its sheer number of entries, whatever was raced, wherever they were raced, if there were
Porsche's on the grid there's always a good chance that one of them finished on the podium.
Unfortunately in the slotracing world 911's were usually outclassed. Unless it was ran as a Cup Class your Porsche would be too high, too heavy, too
short or too narrow to mix it with the other GT's...
...that is untill Scaleauto re-invented the 1/24 RTR slotcar with their simple but good SC-8000 chassis and well detailed prepainted bodies in what
has now become a good range of competitive 1/24 GT's.
Here in the Low Lands, Scaleauto races have brought new live to the 1/24 slotrace scene, we organised 10 races at different clubs last year, won a
couple of them with a SLS, which is good and very stable car.
Being inspired by the Porsche's that Christer has done, I decided that it was time to up the challenge and give the 997 a try.
First did the JWA Martini for the last race of 2011, but when I saw the pictures of their latest release I knew that this was a car I needed to build
and race.
So I entered it for the kick off race in this years "official" championship.
Hope you enjoy the pictures
Scaleauto #33 Hankook 997 GT3 RSR
As with all Scaleauto's the livery of this car is well captured, a combination of crisp tampo printing and brightly painted colors.
There are a few logo's on the frontbumper out of place due to the Scaleauto being a 2009 model (dive plates and different cooling vents )
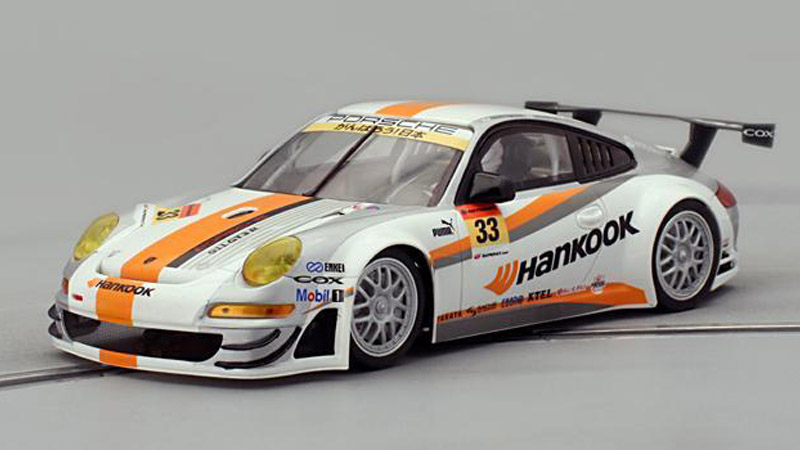 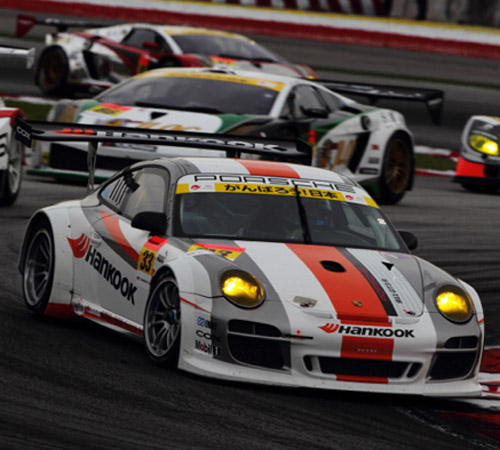
The general body shape of the 997 is very good, a few other details show where Scaleauto modified the tooling of the 997 Cup master to produce the GT3
RSR body.
The bolt on rear wheelarches lack definition and the side kickerpanels are not really as pronounced as they could be, but there's lots of fine detail
to be found on the body as seperate injection moulded and/or PE parts.
Which is why it still baffles me how they could do the headlights as shapeless yellow blobs and did not produce good inserts for those typical 997
bling bling wheels.......but then again...that's where my fun comes in.
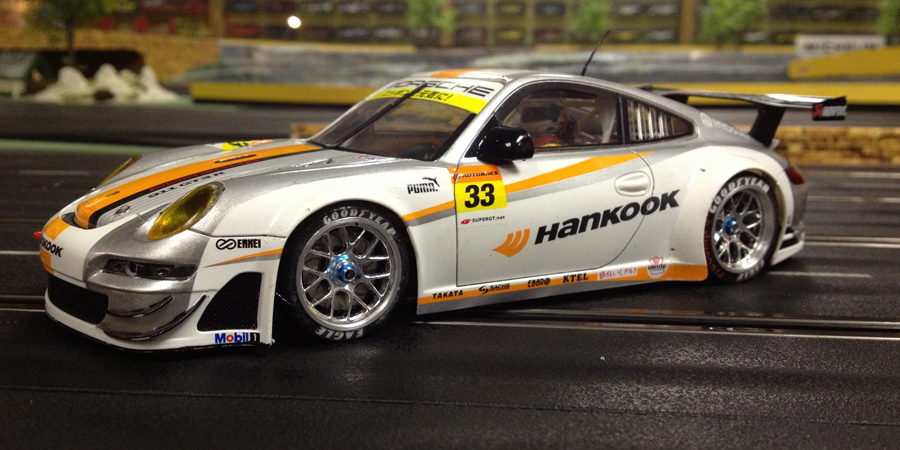 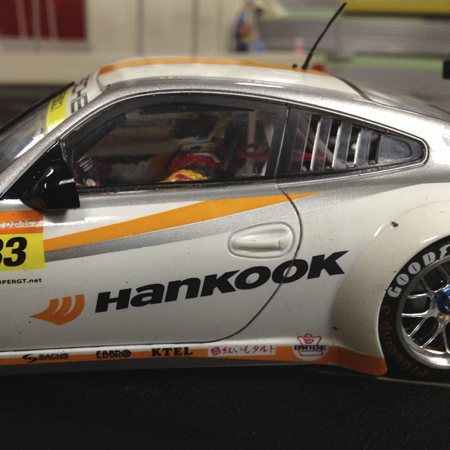
Here's my Hankook on the track after saturday nights last free practice session, usually a good time to add the little details that might otherwise
be lost in "racing accidents", as the scratchmarks on the dive plates show.
Good thing I added a few layers of clear coat over the body to protect it. Did some body retouches as well, cleaned up the ugly moulding seams on top
of the front and rear fenders as best as possible.
Filled in the panel lines with a wash of thinned Tamiya acrylic satin black. Gave the rear wheelarches a more "bolt on" look. Detailed the cockpit
interior a bit with paint, tape and sprue.
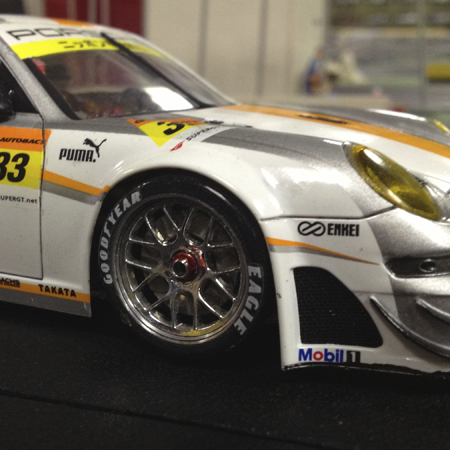 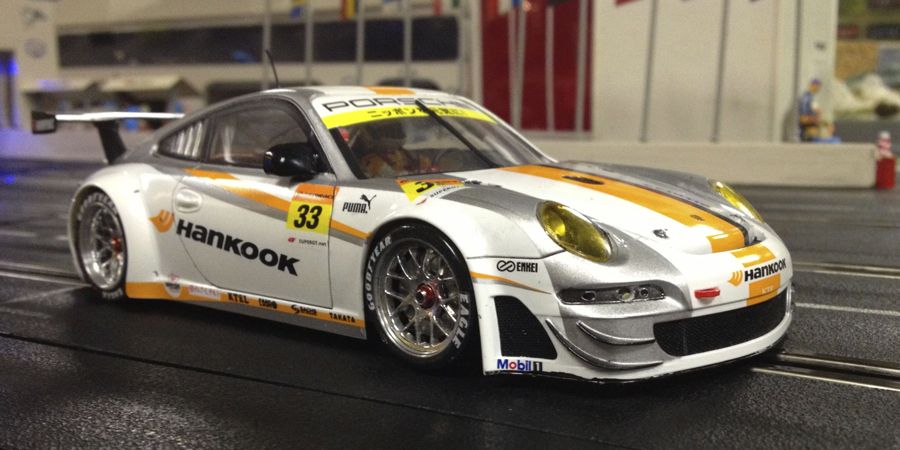
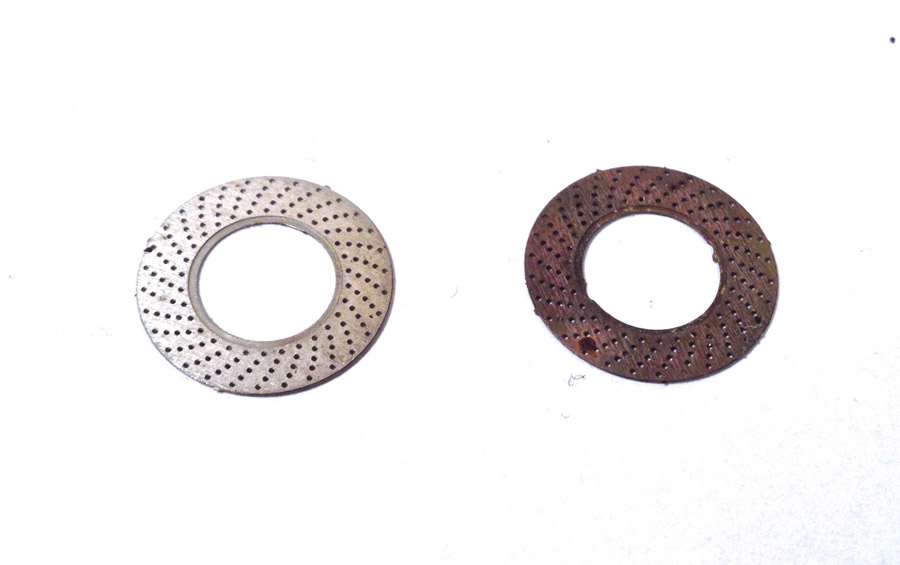
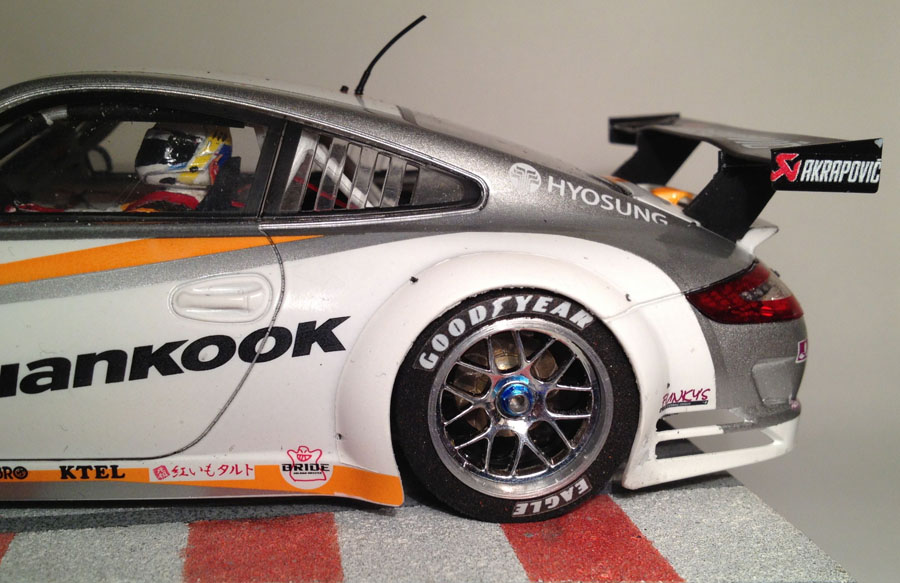
Here's the shoppinglist from "Pimp my ride" : Modified headlight lenses from Fujimi, Sakatsu's beautifully turned aluminium wheelnuts on top of
the bling bling BBS inserts and PE slitted brakedisks from Scaleproduction.
On top a rubber antenna from Slot tech, absolutely crash resistant. Tyre markings are wrong ofcourse, should have been Hancook on those sidewalls, but
did not have time to have those made.
The Goodyear scripts is are self-adhesive stickers as waterslides dont hold well on foam tyres.
Finding out which clear coat to use (one that is oil and cleaning petrol resistant but does not eat the paint and tampo print) was a painfull process
with both the rear spoiler and the front window as collateral damage.
In the end I ended up using Mr Hobby clear (Grey spraycan) Applying it in several thin layers of fine mists, slowly building up the coats from matte
to semi gloss. But I would advise most other slotter's to use the Blue can from Mr Hobby.
Not as oil and petrol resistant, as the grey can, but completely safe on paint, tampo-print and windows. No need to mask of anything 
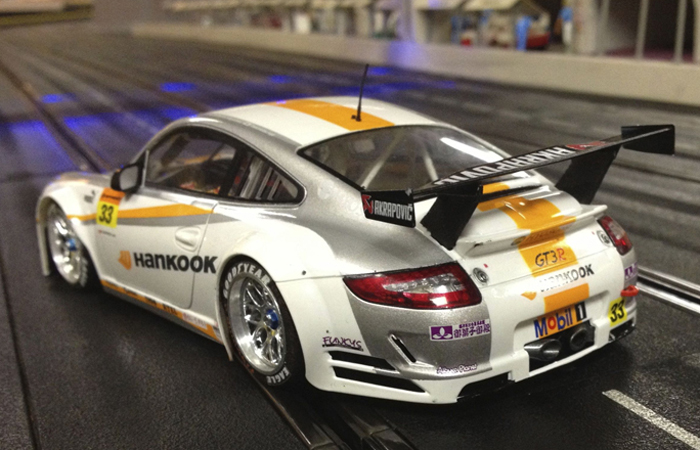 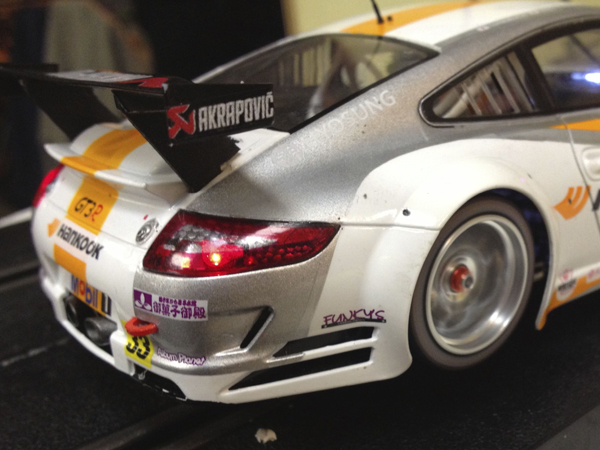
The parts bin helped out with replacing the rear wing, front window and window streamer. No spare Hankook decals so I replaced those with some nice
Akropovic logo's.
Crash protected the whole rear wing by mounting it on flexible supports cut from 0.5 mm rubber. Used Tamiya acrylic to detail the rearlights with some
gunmetal and silver, outlined the rear lenses with Satin black
and coated the headlight and indicator lenses with clear yellow.
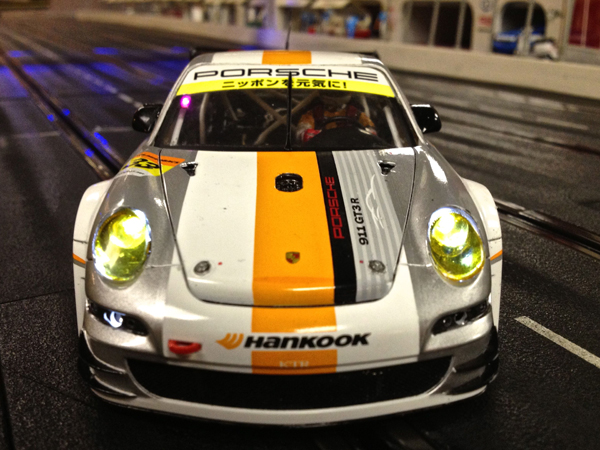 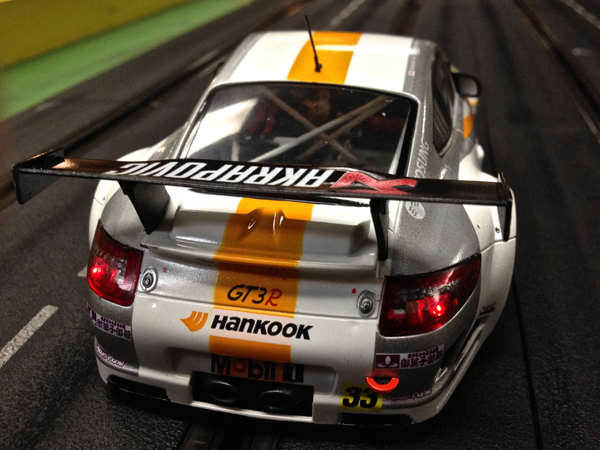
Slight gaffe here, was sure I put the indicator lenses in the box, but come saturdaynight they'd gone partying on there own. Glued the remaining
lenses to the body with Krystal clear.
SMD led's were used for all the lights, 4 headlights (one unfortunately went over the hill while mounting) a pink marking light behind the front
window, 2 rearlights.
Was so pleased with the "clean look" of the Hankook that opposed to my usual routine I chose not to weather the car at all ,
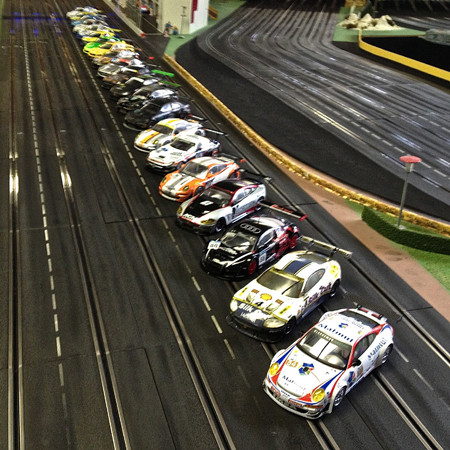
so it was factory fresh when it took its place between its Scaleauto brethren on grid come sunday morning...my pimped Porsche 997...ready to Rumble
|
|
|

|
willem
LMSadmin
Posts: 356
Registered: 5-11-1985
Location: Netherlands
Member Is Offline
Mood: Tired
|
|
posted on 12-2-2013 at 06:28
|

|
|
Brilliant looking car, I must say. Shame it didn't win the concours....
Should have with a long mile ahead of the rest.
But then again. You don't build a car to win the concours but only for your own pleasure and I'm convinced the owner had lots of pleasure building
it, looking at it and driving it although the results do not represent the potential of the car.....
|
|
|

|
tamar
Posts: 804
Registered: 5-1-1989
Location: Gouda
Member Is Offline
Mood: A new beginning 
|
|
posted on 15-2-2013 at 13:27
|

|
|
Clothes make the man, Wheels make the car
Ok some guys have been asking how I did some of the stuff like the wheels etc. etc.
Did not really have too much time during the build but I shot some pictures after the event, as the car needed a "bit of TLC".
It was a racing incident, but the Porsche was t-boned hard in the back and it broke the rear bumper/diffuser.
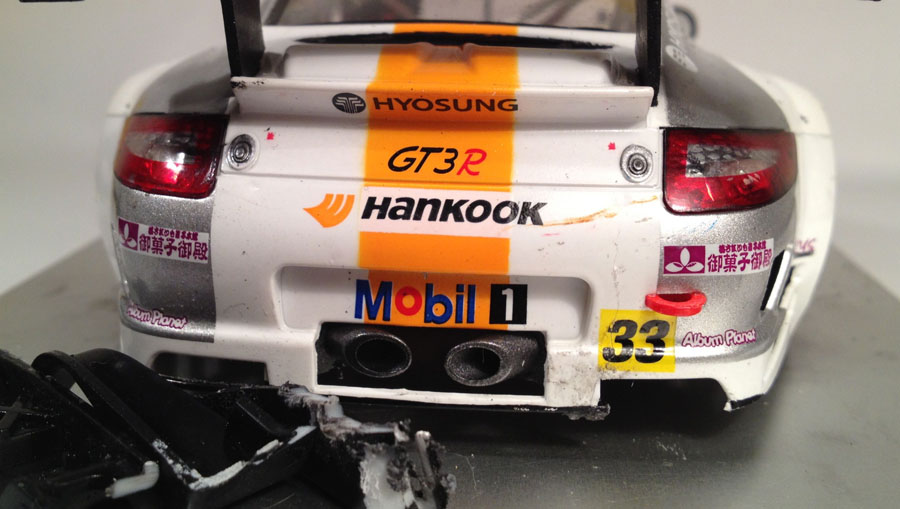
Had to repair it quickly during the race which meant dumping copious amounts of cyanoacrylate glue and glass bubbles in the back.
Overdid it a bit and the excess glue got on the tyres so for the reaminer of the race the grip was bye bye.
On the bottom left are the remains of the rear diffuser/inner bumper that needed to be cut loose of the body.
So after these hardships the first thing I needed to do was to treat myself to a new fresh set of wheels, and not the skinny 26,5 that we use for
racing but big 27,5 motherf####s to fill those rearwheelarches.
(but unfortunately just for show as they rub inside the arches). Anyhow, I'll start with the disks, as mentioned before these are PE parts from
Scaleproduction.
Now bling bling might be good for the rim's, but not for the disks. A good way to weather them is to hold them in the flame of a lighter.
Depending on how long you heat them they go from light brownish to burned blue.
Next step is to paint the inside of the wheelhubs matte or satin black. I usually do this with the wheels spinning at low revs on the chassis.
Fill my brush with paint and gently hold it to the hub, takes mabey 30 second to do a wheel.
The Scaleauto print on the tyre wall comes of easily by rubbing it with you fingernail or a quick swipe with a cloth drenched in cleaning petrol. As
these are show wheels I took all the print of.
For a set of competition wheels regs specify that the Procomp 3 text remains visible.
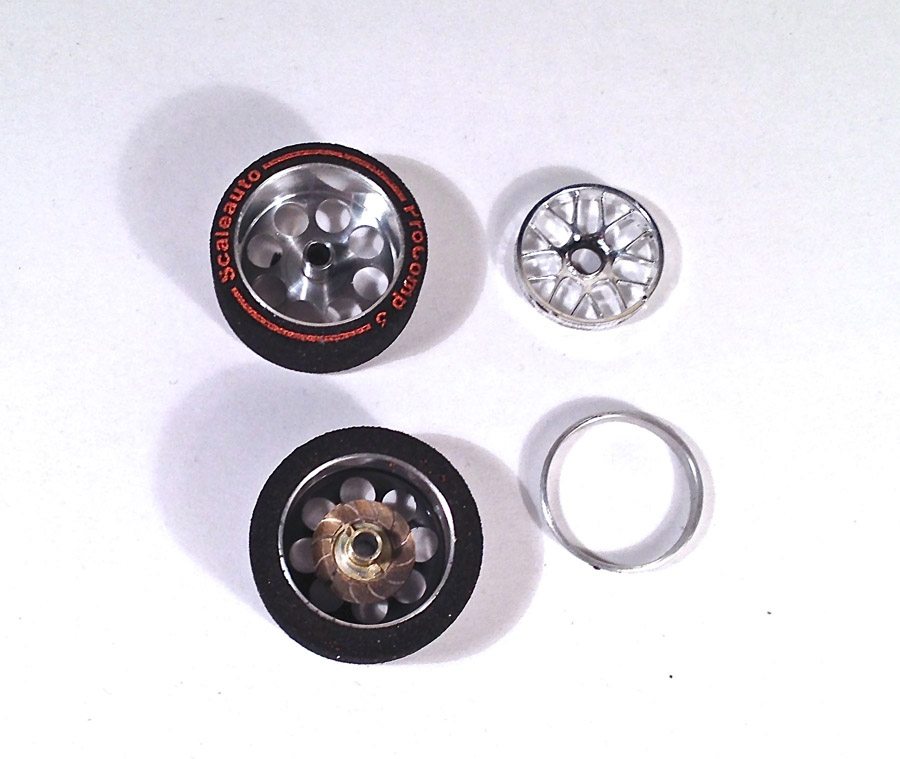
On the right of the picture the parts for the wheelinsert. Those Scaleproduction chromed BBS's are the best insert you can get, but they have one
flaw...
...they're only 19mmø and the inside diam. of the scaleauto wheels is 20mm. So I cut some old 20mm flanged rims (with a inner diameter of 19mm) and
used those as spacers.
Also took out the center of the BBS inserts so they would slide over the axlehub that's in the Scaleautowheel. I wanted these wheels to have that
deep Porsche offset.
Here's a shot of the finished wheels with the Goodyear tyre stickers and the coveted Sakatsu turnen aliminium wheelnut.
Could have gone all the way with the little red BBS decals in the rim flange, painting the valves and adding the wheelnut locking brace, but it was
late and I was dead tired after the race weekend.
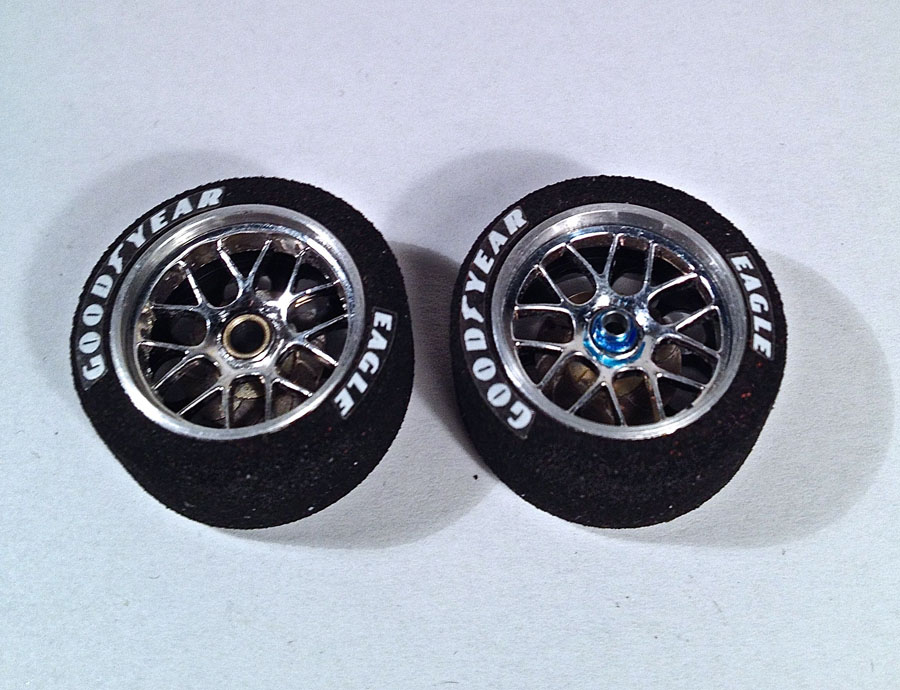
There are those that will say that such an insert is to have for competition use. Each insert weights about 1,5 gram. But I could not care less, as
I'm a self confessed wheel fetishist.
Clothes make the Man....Wheels make the Car 
|
|
|

|
slotmad
Posts: 180
Registered: 26-6-2003
Member Is Offline
Mood: still waiting
|
|
posted on 17-2-2013 at 11:12
|

|
|
I totally agree with Tamar's stattement "wheels make the car". Wonderful done! It makes a difference.
Slotmad
|
|
|

|
|


