tamar
Posts: 804
Registered: 5-1-1989
Location: Gouda
Member Is Offline
Mood: A new beginning 
|
|
posted on 16-5-2007 at 13:38
|

|
|
FIA GT Murcielago R-GT stage 1
Against all common procedures at RfH, somehow work on the car for Spa is already in full swing.
Common practice is of course to do it not the easy way...but their own way 
Instead of using the Fujimi kit with the superb Scaleproduction transkit......we wanted to make our own Lambo.
here are some first pictures.
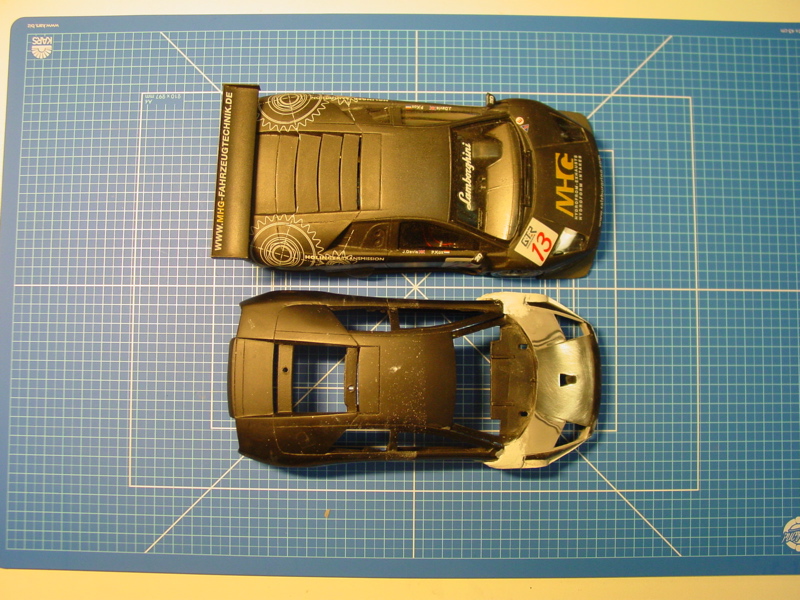
On top is the R-GT Nick build a year ago. Fujimi kit & Scaleproduction transkit. It's totally 100% carbon-decalled!
The Japanese kit is a bit oversized and to bulky, specially at the back. And if you add the transkit it becomes even bigger.
Below is the Burago Metalo kit which in my opinion captures the lines of the Murcuielago better than Fujimi.
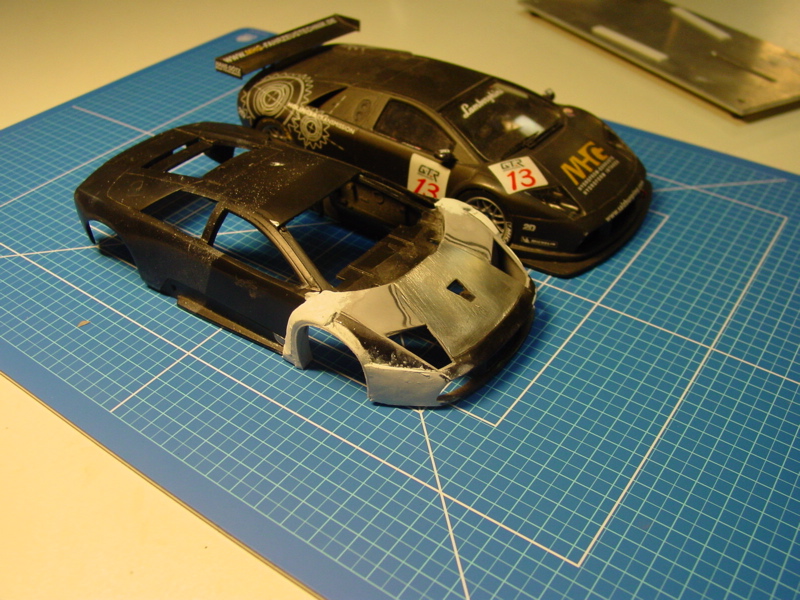
A lot of filing and filler to clean up the lines of the metal kit has already been done. Although the parts are quite good, opening doors meant that
aligning them was a pain in the *##. One discintive feature on the 2007 model is the central Naca duct on the hood. This is the first time I've used
a metal body, but milling the metal was actually quite easy.
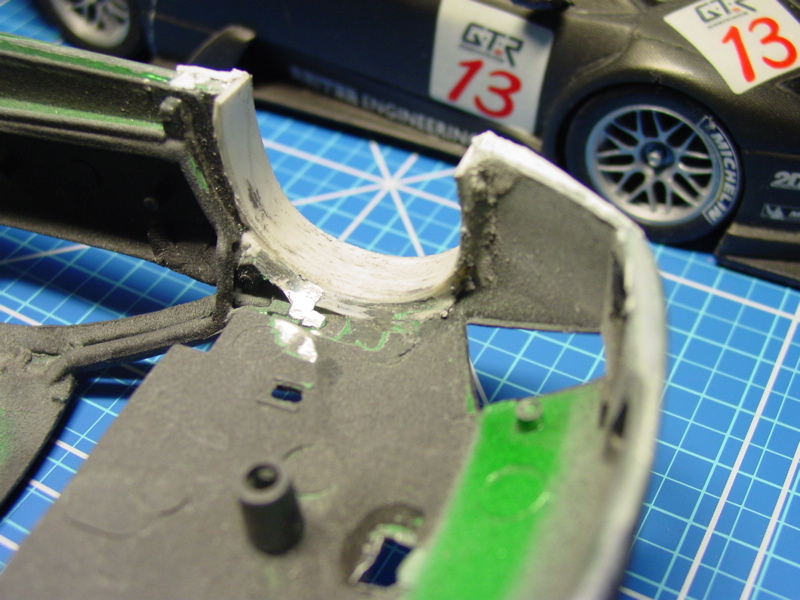
According to the data the R-GT should be 85,75mm wide in 1/24 which means the Burago has to grow by some 6mm @ the front. First step in making the
wide front fenders was to enlarge the wheelarches. Got to make room for those 26mm fronts. When I had the right clearance I glued strips of 0.75mm
thick plastic sheet in the enlarged wheelarch. These served 2 purposes.
- To set the correct witdh
- To serve as a foundation for the milliput that I use to build up the fenders
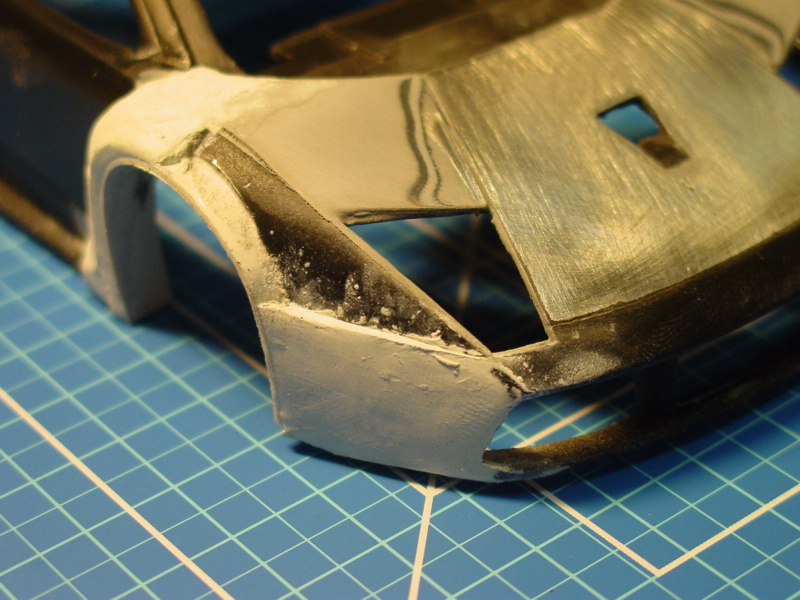
Getting bot fenders the same is alway a diffucult job, so as to be able to keep a good check on their symitry I added the milliput in 2 stages. By
first modeling the rear of the fender and the lower part of the front it was easy to keep a check on the thickness and profile of the miliput.
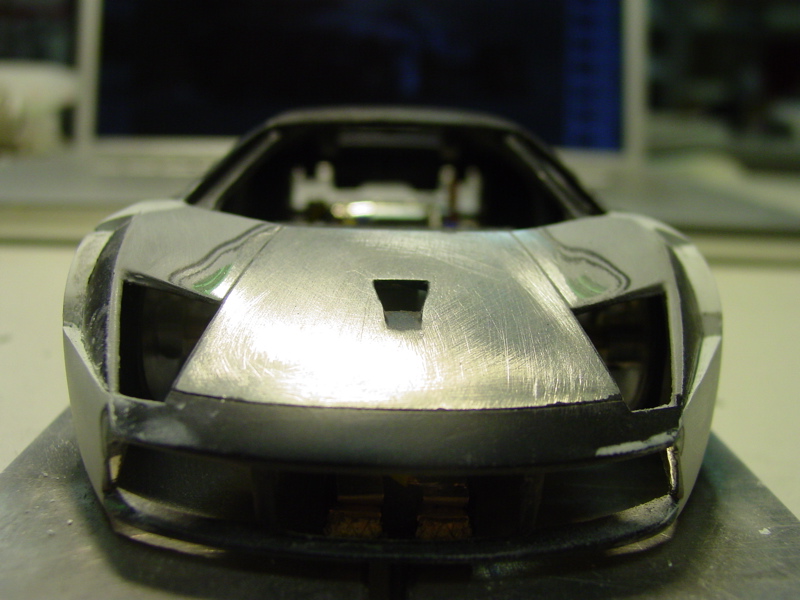
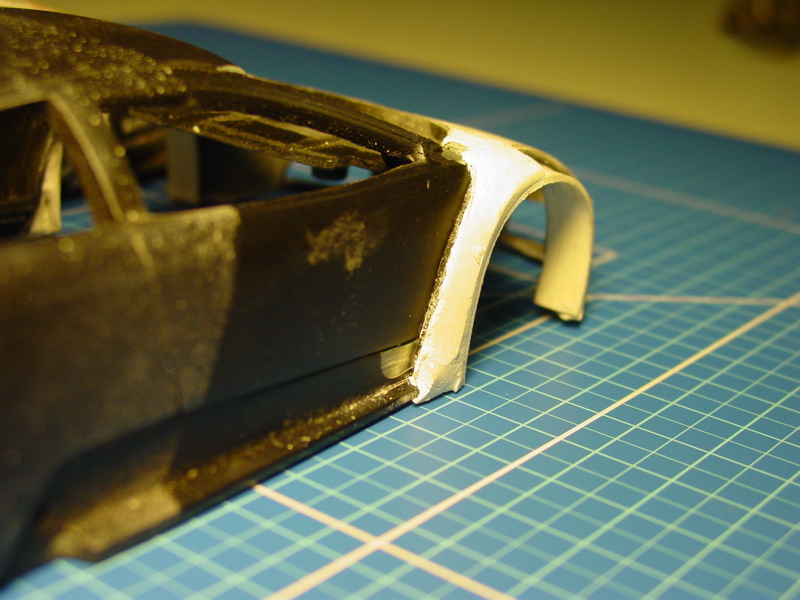
To create the "gap" between the bodywork and the fender I used some double sided foamtape as a spacer. This was easily removable after the milliput
hardened.
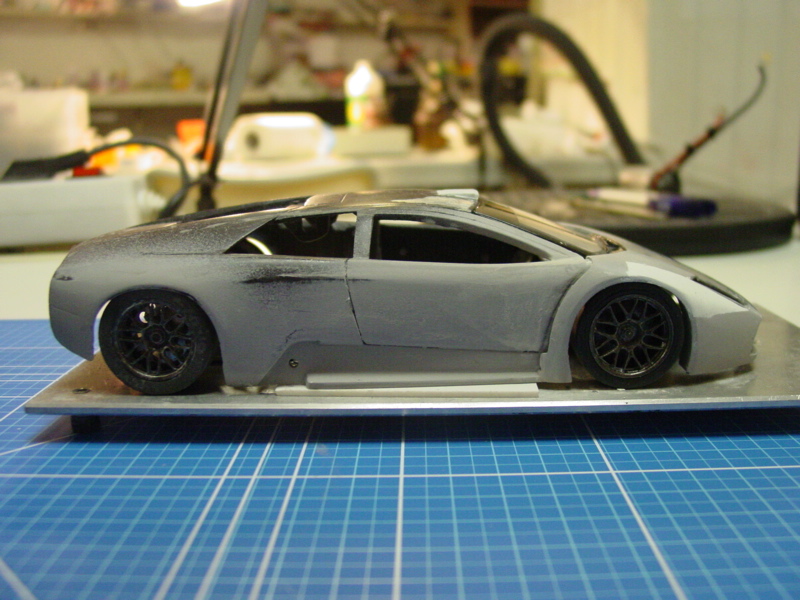
Here's a pic of the car with the top of the front fender added. Looked good but...something was bothering me
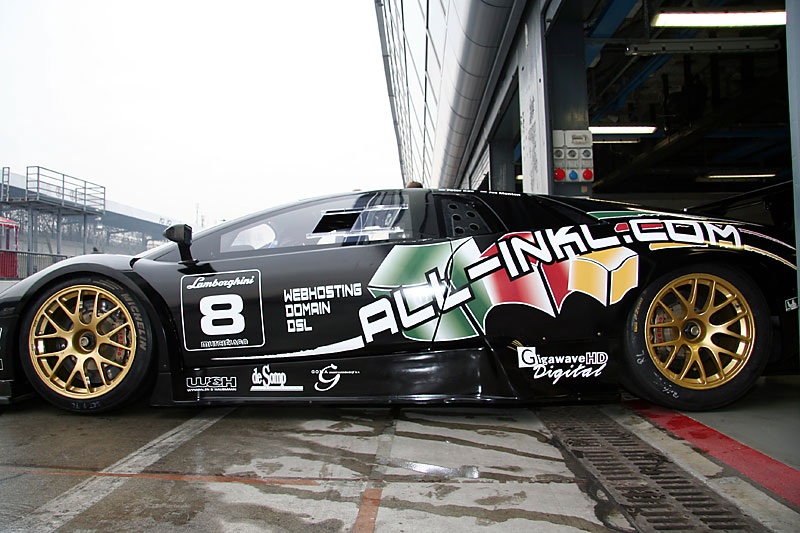
After looking at the ref pictures again and again, I noticed that in profile, the higest point of the front fender was at the centerline of the wheel
arch, where as @ my fender the highest point was at the windscreen.
Well...back to the drawing board
|
|
|

|
Alvaro
Posts: 19
Registered: 11-1-2007
Location: Miraflores de la Sierra
Member Is Offline
Mood: Building the best and fast car.
|
|
posted on 16-5-2007 at 19:17
|

|
|
Hey my friend... you are a magician with the bodies cars... GREAT 
Regards
Rural Slot
Alvaro Sarabia
|
|
|

|
fola
Posts: 338
Registered: 8-10-2006
Location: The PLANET Earth.
Member Is Offline
Mood: ADMIN wanna be I D A M N right I'm building again & Sleepless in the celler
|
|
posted on 16-5-2007 at 19:18
|

|
|
Whatcha gonna do now??
Tell a few lies so that the nose can grow???
Your lambo has a new name - PINNOCHIO GHINI ;-)
All the best!!
Did you send my stuff??
The inserts are in the making......
Rgds,
Fola
|
|
|

|
tamar
Posts: 804
Registered: 5-1-1989
Location: Gouda
Member Is Offline
Mood: A new beginning 
|
|
posted on 17-5-2007 at 06:43
|

|
|
@ Geppetto
No Geppetto my nose is still its normal modest size, cause its all true 
Gert's here in Amsterdam and he will deliver your stuff next week when he rides trough southern Germany
Got you the fast hardener for the epoxy and Willem has collected your controller stuff
greetz
Tamar
|
|
|

|
tamar
Posts: 804
Registered: 5-1-1989
Location: Gouda
Member Is Offline
Mood: A new beginning 
|
|
posted on 19-5-2007 at 19:17
|

|
|
Murcielago R-GT stage 2
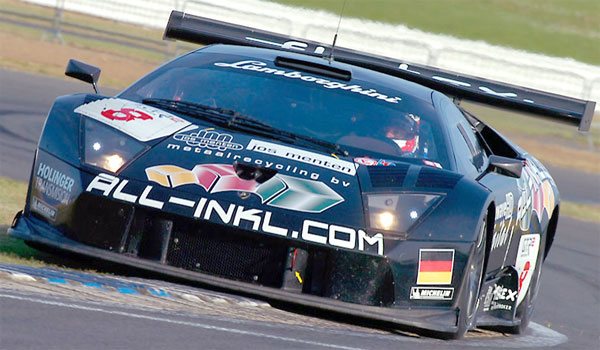
Always nice to see your chosen subject doing well to keep you motivated. Here's Peter Kox taking the R-GT on a very tight line over the Silverstone
curbs last weekend....
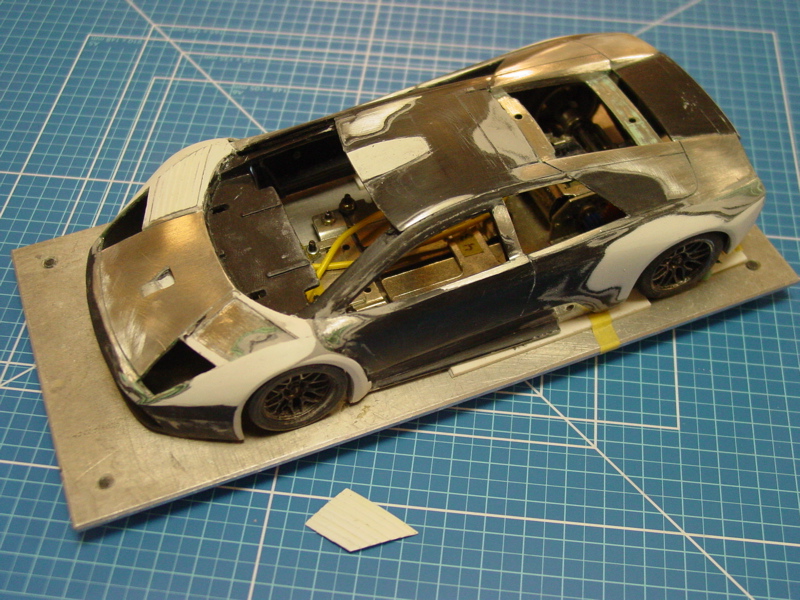
Back to 1/24....here's the Murcie after some late night sessions. Most of the work was concentrated on finding the correct profile of the front
fenders. I also sanded the body almost back to the bare metal as a lot of detail had been lost under the several layers of primer.
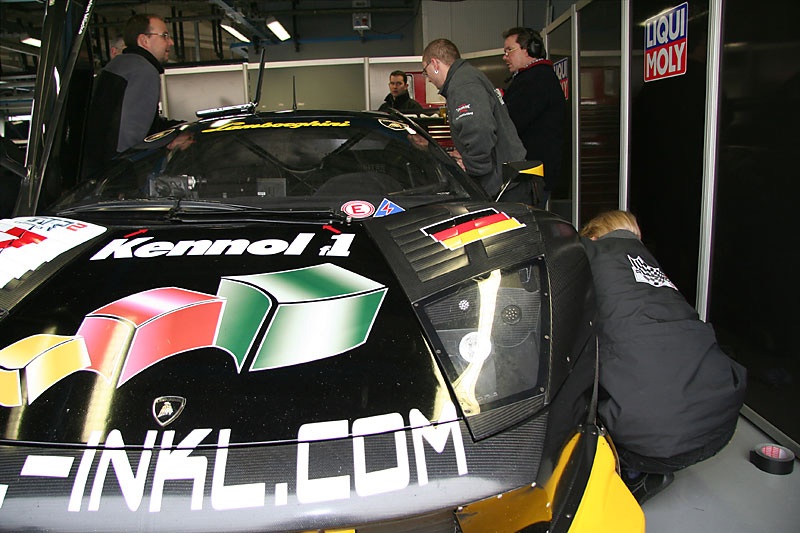
On of the most distinctive features of the 2007 Lambo are the double rows of louvres on top of the wheel arches. These caused me some considerable
headaches, how to make them? As a result I kept working around the problem, thinking I would tackle it later, but as I started to reprofile the front
fenders I had to find a solution.......
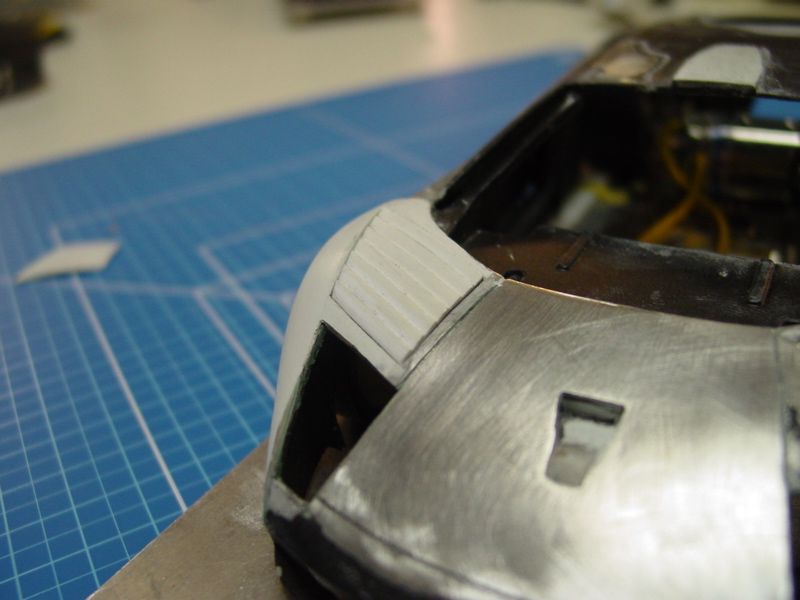
Going trough my extensive extra parts bin did not bring anything, but I did found some old sheets of plastic sheet, These are actually rooftiles you
use for H0 modeltrain houses, I amost forgot I had them, but on set had the correct size and number of tiles for the louvres.
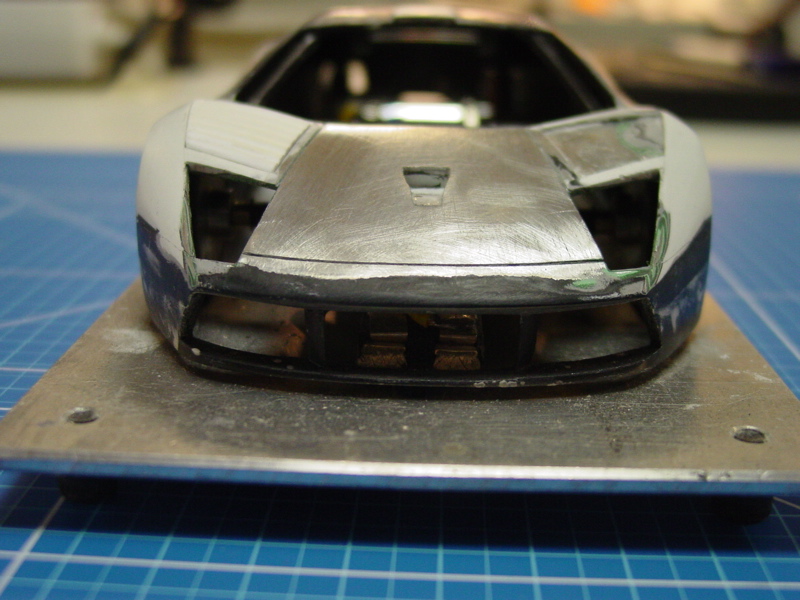
I cut the sheet to shape and as its only 1mm thick it was easy to bend thyem to get the correct curvature. The only problem was that I had to mill 1mm
deep recesses on the hood to get them flush with the bodywork.
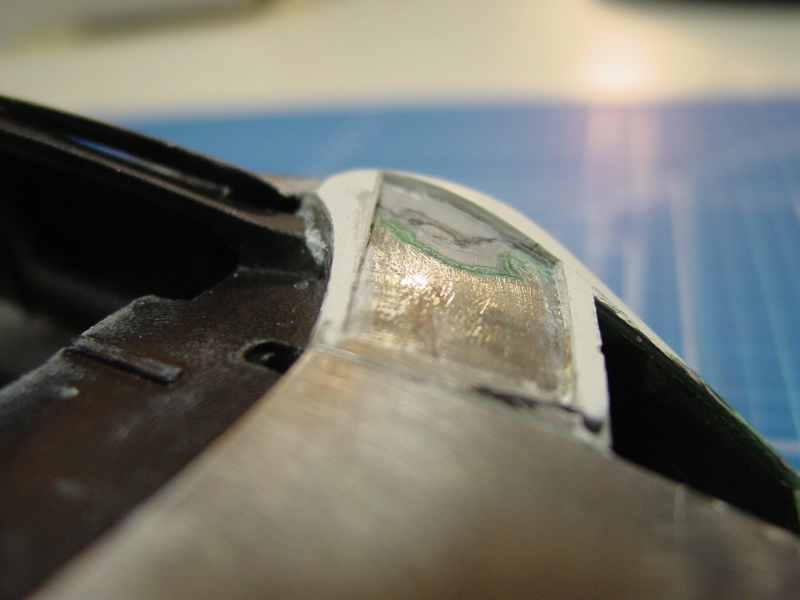
Here's a picture that shows well how I build up the fenders with Milliput. Really great stuff, its substance is hard enough to model it with a
spatula, you can cut it with a sharp knife, and as it is water based, you can smoothen it with a wet tools so you get a finish that hardly needs any
sanding. Which is advisable because once its dry it becomes rock hard.
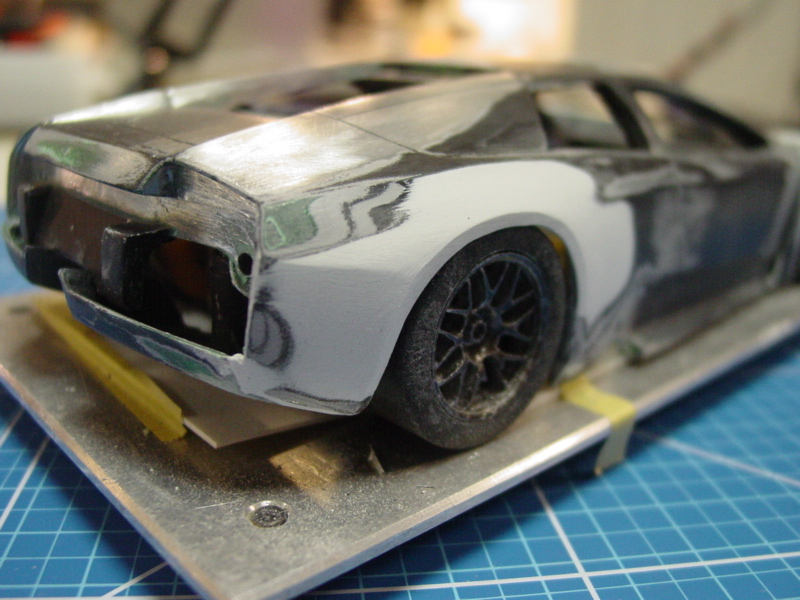
After all the filing and shaping the sharpness of the body lines had dissapeared so I needed to ad some milliput to regain the flat egde around the
wheelarches.
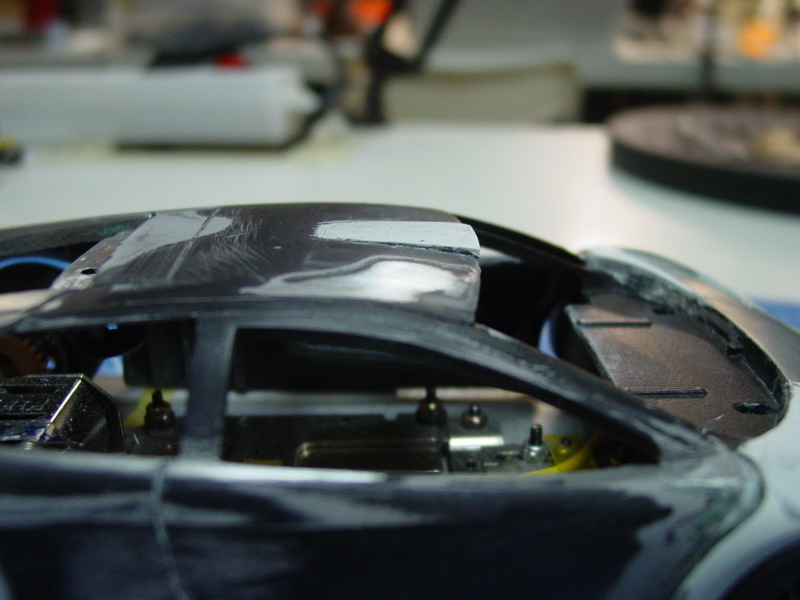
Checking the ref pics I also noticed that the airscoop on the roof was much longer, I had some mixed milliput left so I corrected that as well.
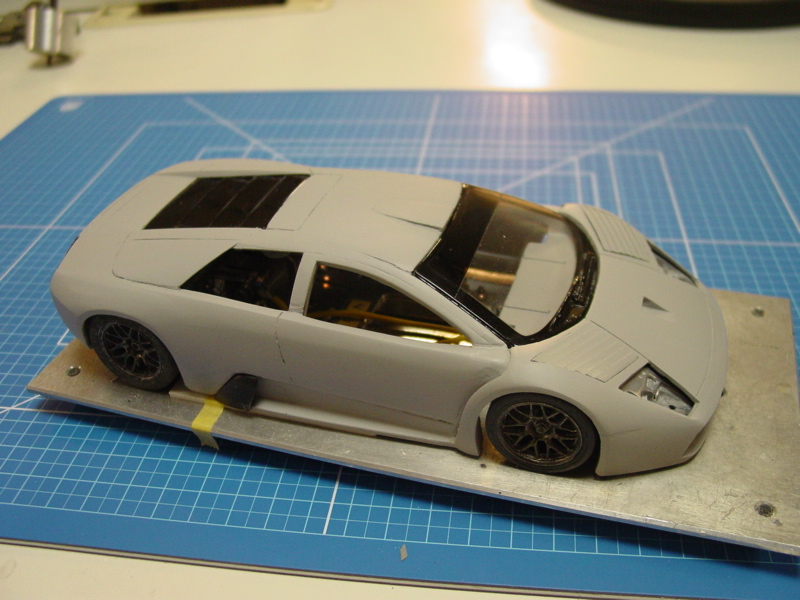
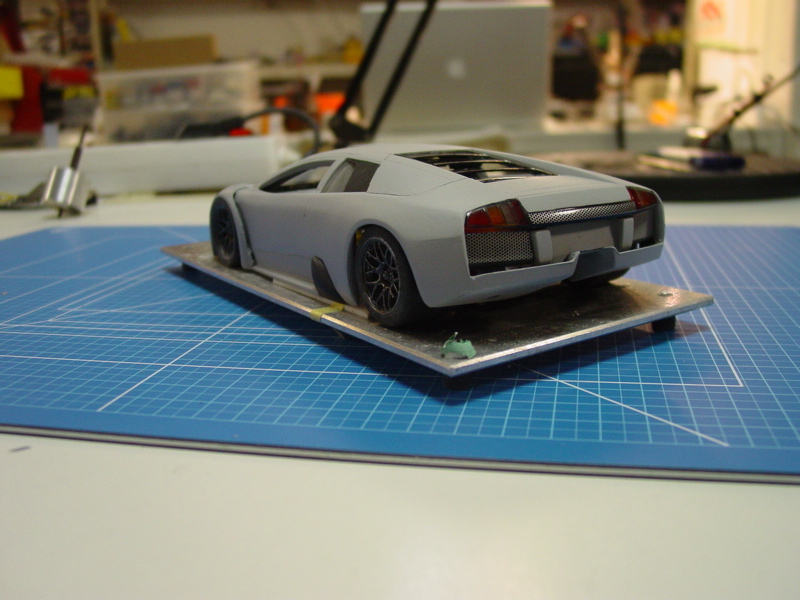
The R-GT after stage 2 with a new coat of primer, I was really happy with the result...and then Nick dropped by and said....the front louvers are not
aligned, one's more to the left than the other.
Shit....back to the drawingboard 
Tamar
|
|
|

|
Gert
Posts: 400
Registered: 31-8-2003
Location: Belgium
Member Is Offline
|
|
posted on 19-5-2007 at 21:43
|

|
|
Shit Happens  
Greetz Gert
|
|
|

|
fola
Posts: 338
Registered: 8-10-2006
Location: The PLANET Earth.
Member Is Offline
Mood: ADMIN wanna be I D A M N right I'm building again & Sleepless in the celler
|
|
posted on 20-5-2007 at 06:16
|

|
|
dang! lookin really good!!(not that I expected any different.. ;-)
think I have to come over again and beg you for a master....
Forgot to ask you to get me some of that milliput stuff and some
blue tack.... sch**ße
Thanks again for your help, and Wilhelm for the stuff....I owe you
guys! Will be on his case about how to put the stuff together......
P
F
|
|
|

|
Bruce
LMSadmin
Posts: 10
Registered: 9-5-1995
Location: Heaven
Member Is Offline
Mood: No Mood
|
|
posted on 20-5-2007 at 07:51
|

|
|
Stuff
Well, aint that always the trick to everything in live........
Putting the controller together isn't that difficult. The mechanical part is the the most difficult. Adjusting the wiper pressure, the bearings, the
spring and the wiperboard. I'll help uou through it when you start.....
Note: You'll need a parma turbo controller for the buttons
Willem
|
|
|

|
tamar
Posts: 804
Registered: 5-1-1989
Location: Gouda
Member Is Offline
Mood: A new beginning 
|
|
posted on 20-5-2007 at 12:29
|

|
|
| Quote: | Originally posted by fola
Forgot to ask you to get me some of that milliput stuff and some
blue tack.... sch**ße
|
Hello Fola.
You should be able to pick up milliput at the good modelshops in Germany...what do you mean with the Blue tack ?
|
|
|

|
fola
Posts: 338
Registered: 8-10-2006
Location: The PLANET Earth.
Member Is Offline
Mood: ADMIN wanna be I D A M N right I'm building again & Sleepless in the celler
|
|
posted on 20-5-2007 at 18:04
|

|
|
http://www.rai-ro.de/webshop/deutsch/
Best. Nr. 03-001A 2 Flaschen je 1 kg € 66,90
Thanks wilhelm, will get back 2 you. Saw an Ollislot controller, recently. felt good.....
Tamar you need to check this stuff out. Mixing is no sweat, dries fully in 2 Hrs
is plain fantastic......
Just back from a BBQ - n Drank 2 much wine cant write straight...
|
|
|

|
fola
Posts: 338
Registered: 8-10-2006
Location: The PLANET Earth.
Member Is Offline
Mood: ADMIN wanna be I D A M N right I'm building again & Sleepless in the celler
|
|
posted on 21-5-2007 at 13:01
|

|
|
Tamar,
did you remember the Vac. formed DBR9 inlet....??
F
P.S Gert will b here on Wed. ... ;-))
|
|
|

|
tamar
Posts: 804
Registered: 5-1-1989
Location: Gouda
Member Is Offline
Mood: A new beginning 
|
|
posted on 22-5-2007 at 11:24
|

|
|
Shittt
No I forgot...and so did you
That's why I called you last thursday, and asked you ...need anything else? 
I'll give it too gert on his next round.
BTW, Polyservice just got some new silicone, probably the stuff you were talking about.
Its orange, it's soft & dries in 2 hrs, potlife of 30min and indeed, no air bubbles 
|
|
|

|
tamar
Posts: 804
Registered: 5-1-1989
Location: Gouda
Member Is Offline
Mood: A new beginning 
|
|
posted on 23-5-2007 at 02:11
|

|
|
R-GT Stage 3
Back from the drawingboard........
Repositioned the louvres so that they're more symetrical, managed to loose one in the process  finally gave up looking for it and cut a new one finally gave up looking for it and cut a new one
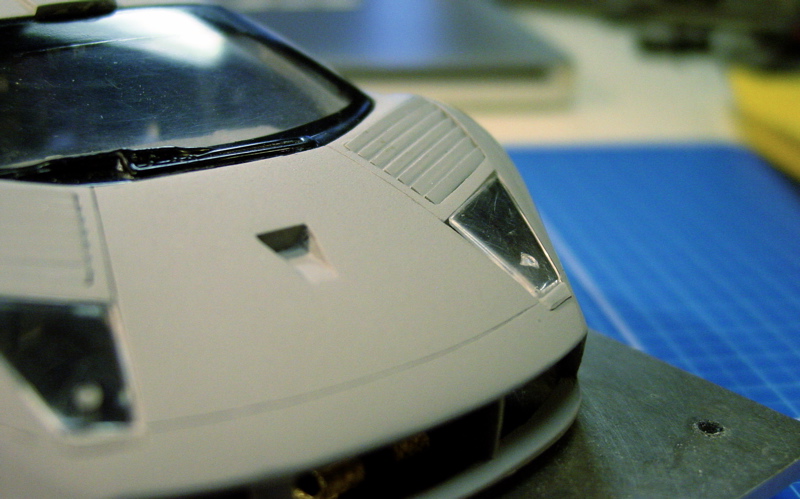
Also recorrected the edge where the frontfender joins the hood, looking at the pictures this edge is knife sharp and runs in line with the
headlights.
So with most of the body in its correct shape (or at least so I thought...more about that later) it was time to turn my attention to some detail
parts. Looking at the body for weeks now, I just couldn't stand it anymore....this car needed a wing ....badly!!!

As you can see on the ref pic, the 2007 R-GT sports a full width rear wing with a raised centre section. Should not be too difficult, a wayward
Carrera C6R was happy to donate one....
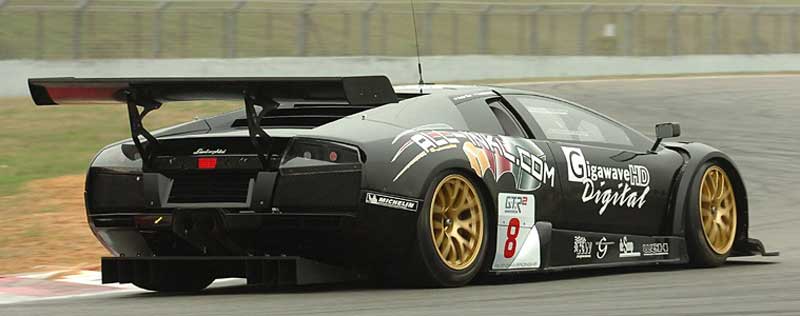
But a big problem with the R-GT is the way the rearwing is mounted......way out @the back, and look at those flimsy supports, there's holes and
brackets all over the place! 
Ok first things first...the wing. Athough the shape of the C6R is ok, it is way to narrow (79mm) . Figures as the Carrera is only 82 mm at the back,
but to cover the Murcie's ass it needs to be 85 at least.
So I asked Gabe to copycat the spoiler (great stuff that new silicone) and I poured me 2 wings. Why 2, because that's the easiest way to widen the
spoiler and keep the correct profile.
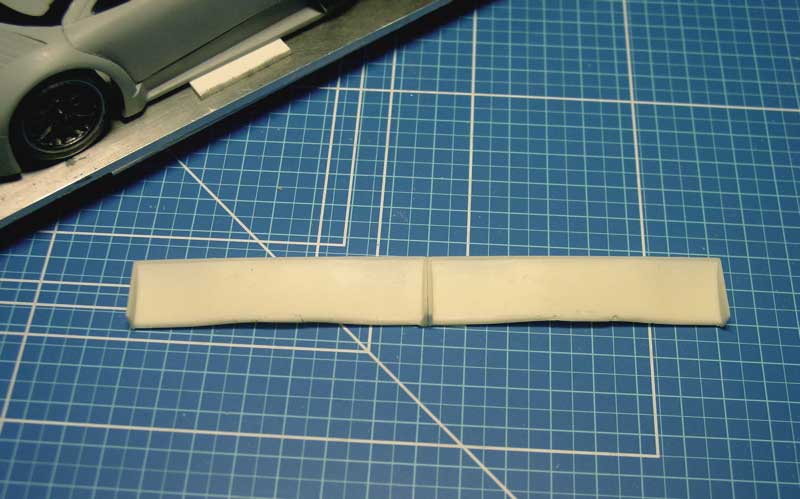
Here are the 2 resin wings. First step is simply to glue both spoilers together @ the endplates. The wing needs to "grow" by 6mm so..mark 3mm from
the endplate and cut!
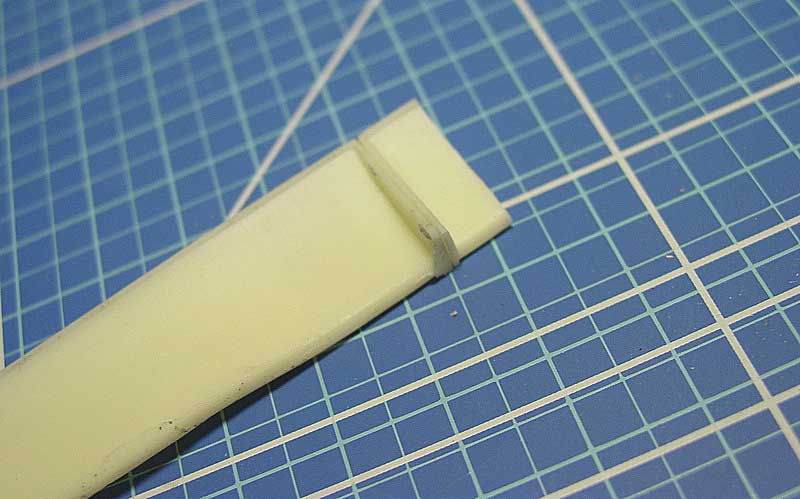
Glue the part you've got left to the other endplate and cut again. The wing is now 87mm wide (forgot to compensate for the thickness of the endplate
 ) Sanding down the endplates was easy and with just a bit of thick
superglue as filler the wing was ready for primer. ) Sanding down the endplates was easy and with just a bit of thick
superglue as filler the wing was ready for primer.
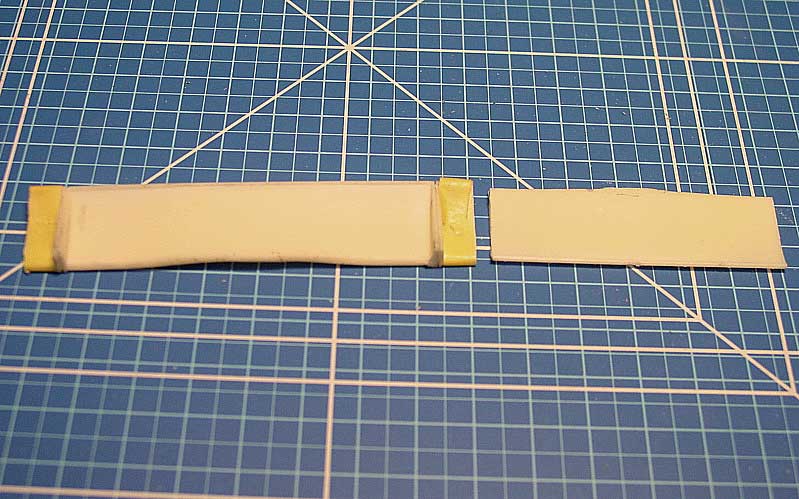
While I was waiting for the Primer to dry I thought ...what the heck, lets try to do the wing supports. So I took some 0,5mm carbon sheet and started
to file and drill and shape..until the primer of the wing had dried....and dried, and dried.
In between I cut 2 slots in the wing for the supports and gave it a quick shot of black so that that could dry as I continued on the wing
supports.......
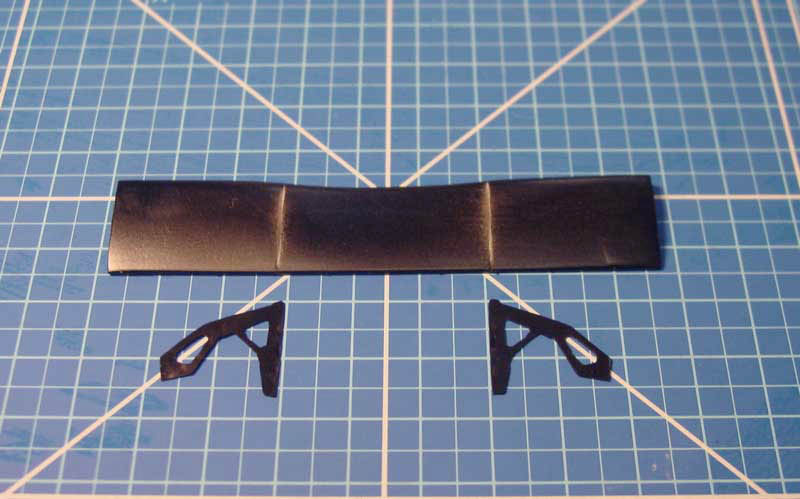
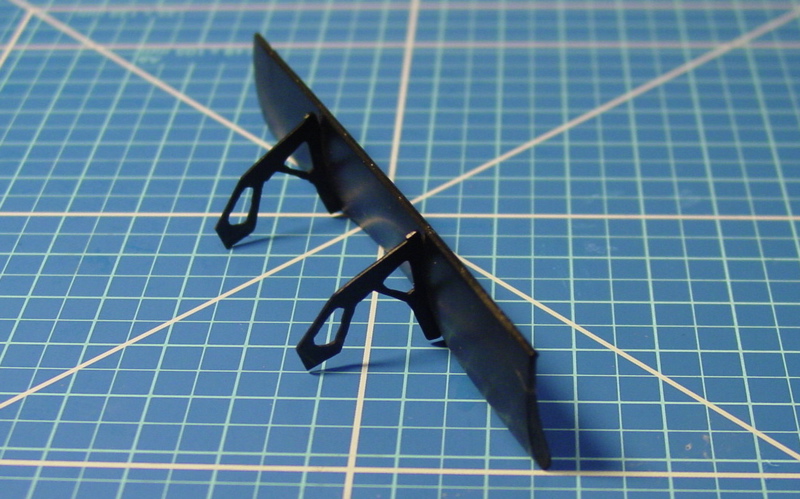
Here's a pic of the seperate parts, and the assembled wing, not really happy with the shape of the supports, but then again...when did anything go
well on its first try
Cutting the slots in the metal body was a pain...and to keep the wing in its place I stuffed some sponge between the supports.....
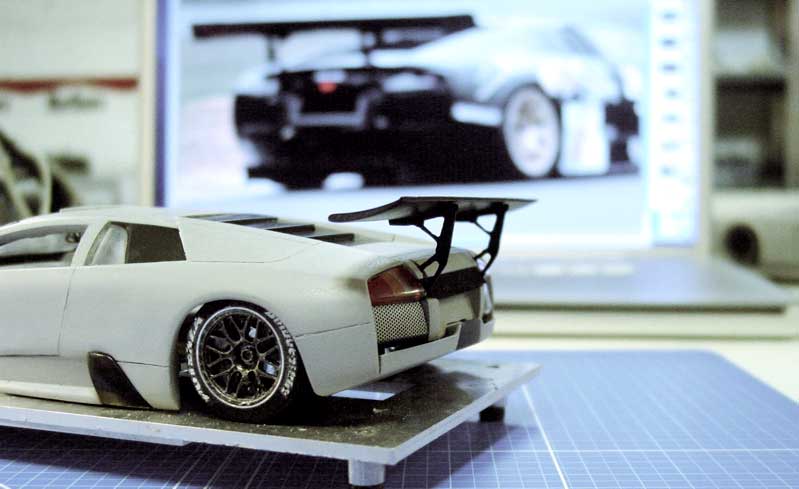
But hey...at least the car has a wing...I'll worry about how to make new supports..that are both strong and flexible later...for now...I'm happy to
enjoy the view
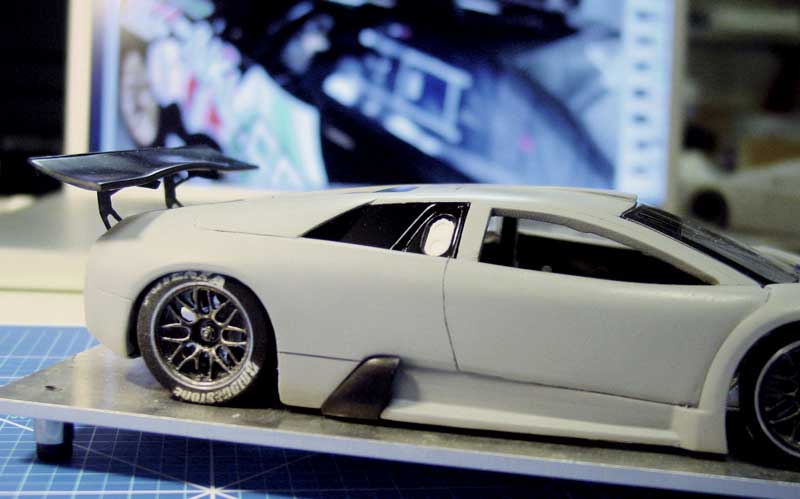
Other detail parts that were adressed were new louvres for over the engine bay.....(the Burago louvres did not run over the full width of the bay)
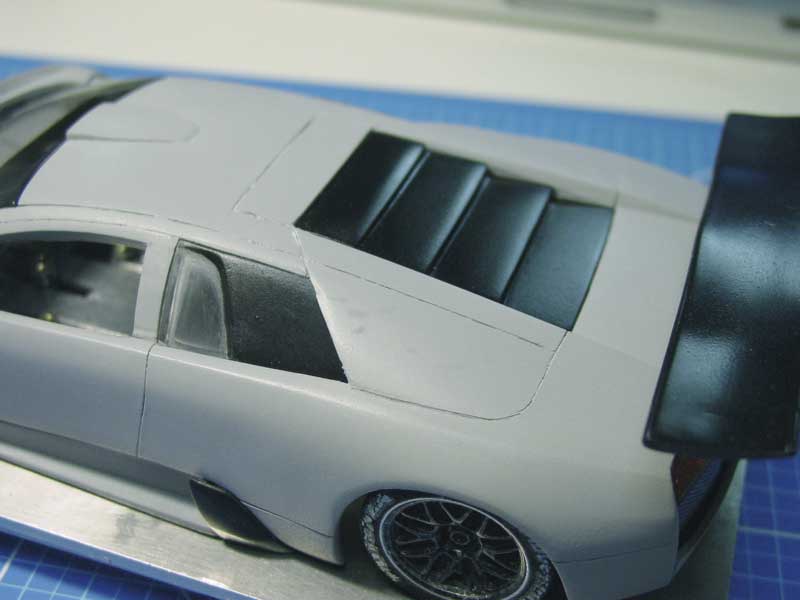
...and the recessed fuel filler. I glued some 2mm sheet styrene behind the window and cut the oval and shped the sides. Fillercap came courtesy of an
old Nissan 390 kit. Still needs some cleaning up, but not bad for a firsst attempt
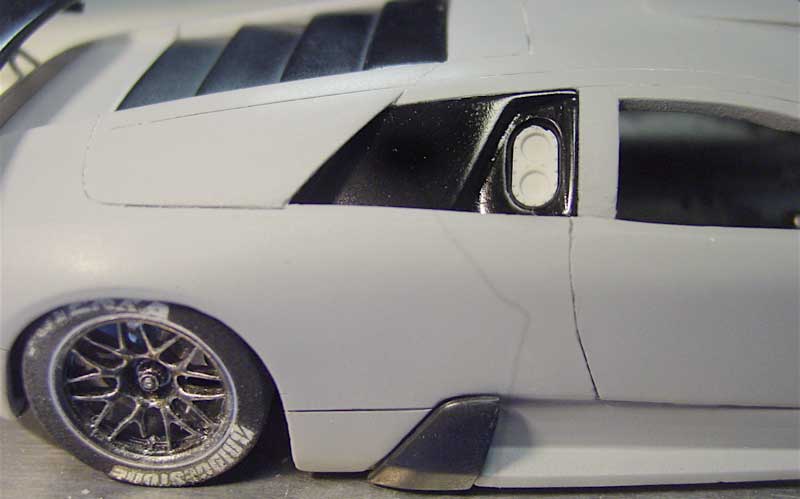
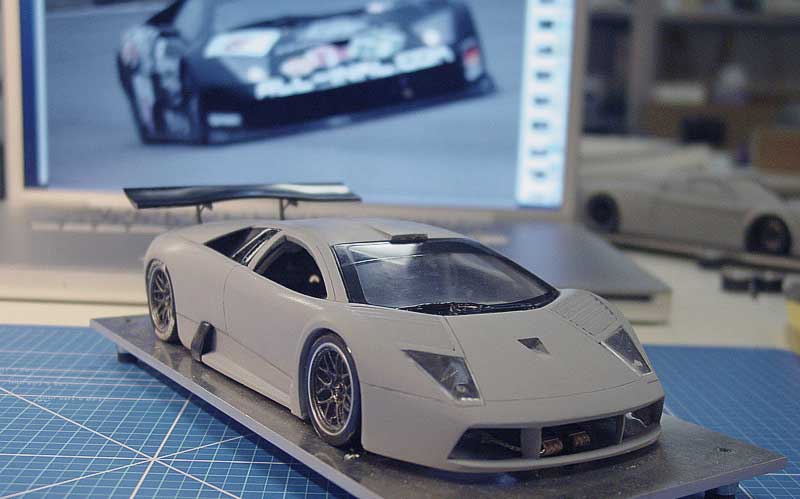
Last major job is to build a front splitter and close the side windows, but only the side windows are neccesary before I can start pouring some
silicone. ...progress has been made.
So I'm happy...that is until I get an email that the Autoart Lamborgini that I ordered some time ago has finally arrived. As I get into the car to
pick it up ...I think: Oh no...it's like that DBR9 nightmare all over again
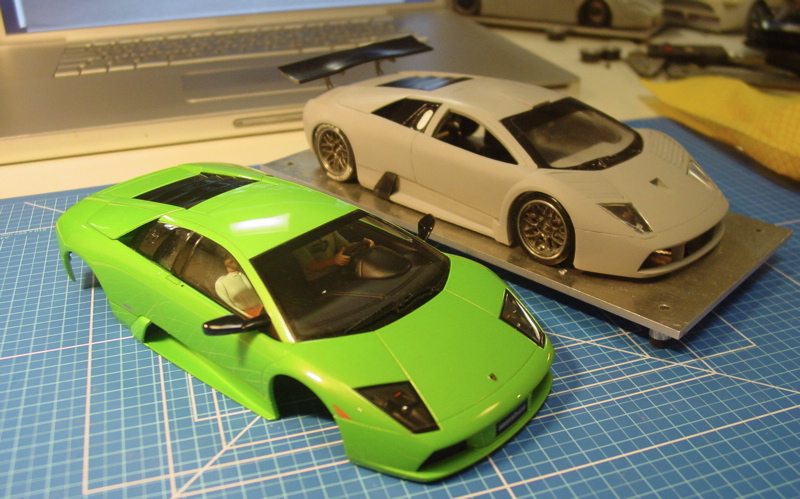
And indeed, the lines of the Autoart are much sharper, the nose is longer and the detail.......
well back to the drawingboard...again!
|
|
|

|
fola
Posts: 338
Registered: 8-10-2006
Location: The PLANET Earth.
Member Is Offline
Mood: ADMIN wanna be I D A M N right I'm building again & Sleepless in the celler
|
 posted on 23-5-2007 at 05:49 posted on 23-5-2007 at 05:49
|

|
|
| Quote: | Originally posted by tamar
No I forgot...and so did you
|
Thought Gert was coming to DE just to bring me the inlet????
Dont you have a postal service in RFH Land?
The PinocchioLago looks sweet, but then, so did your AM just
B4 it got scraped. The Burago was just a scape goat right?
BTW how do you cast the Spoiler since you need two surfaces?
Got the blue Tack and milliput on order too. Blue tack is a bit
like clay, stays soft and is not so messy .
How much does a kilo of the orange stuff cost? does it mix 1 to 1?
the 12 buck/set version

the 5 buck/set version

guess I'll go for the 5 and a dremel.......
I'll send yours with the Post as soon as I get them....
will also try to make some my self.
CYA
F
|
|
|

|
fola
Posts: 338
Registered: 8-10-2006
Location: The PLANET Earth.
Member Is Offline
Mood: ADMIN wanna be I D A M N right I'm building again & Sleepless in the celler
|
|
posted on 24-5-2007 at 06:14
|

|
|
Got the stuff!!
Thanks guys, you are absoulutly the best!!!
The 455 WOW!
The controller stuff wo wow!!
Thanks
|
|
|

|
Gert
Posts: 400
Registered: 31-8-2003
Location: Belgium
Member Is Offline
|
|
posted on 24-5-2007 at 17:48
|

|
|
Postal Service
| Quote: | Thought Gert was coming to DE just to bring me the inlet????
Dont you have a postal service in RFH Land?
F |
Yes Fola they do have a postal service in RFH Land
Its a silver colord truck making the German Autobhan unsafe  
Greetz Gert
P.S. Will deliver the inlet in 2 weeks 
|
|
|

|
fola
Posts: 338
Registered: 8-10-2006
Location: The PLANET Earth.
Member Is Offline
Mood: ADMIN wanna be I D A M N right I'm building again & Sleepless in the celler
|
|
posted on 24-5-2007 at 20:27
|

|
|
All positions!
Was good to see you yesterday.
Hope you had a good trip back and that your
trip to DE was fruitfull.
Thanks for delivering the stuff... I almost forgot
that you brought it because i just felt it was so
cool you were in Böblingen.
Greetz from all of us!
Yinka, Dami and myself !
|
|
|

|


