|
|
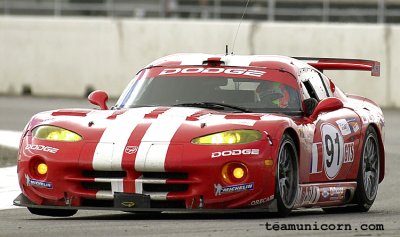
 Ever since I saw the first Vipers run at Le Mans I really loved that car. There are some nice Viper kits out there...but unfortunately they are all 1/25. Ever since I saw the first Vipers run at Le Mans I really loved that car. There are some nice Viper kits out there...but unfortunately they are all 1/25.
Now for the modellist that's not a problem..its just a bit smaller...But I wanted to race my Viper, and race it competitively!
As the competition was running 1/24 bodies which gave them the max allowed trackwidth (83mm) my Viper needed to be at least just as big.
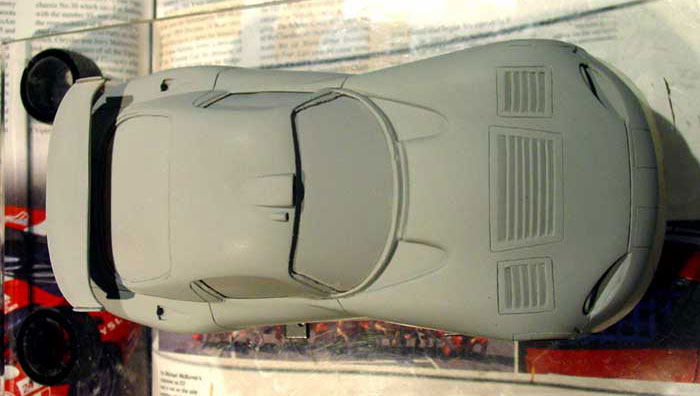
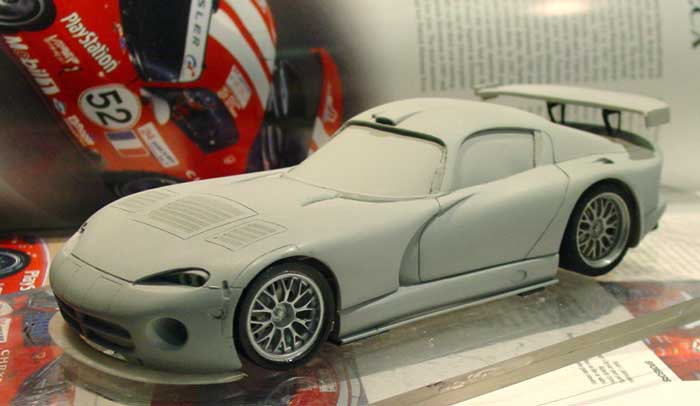
I had done some silicone moulds before and did some gfk bodies, but this would be my first ground up "master to finished car" project. I decided to build the Viper at the height off its career, the last Oreca "works" GT2 Viper as raced @ LM 2000.
At least there was a decal sheet available for this car by Carpena, so in the restricted time available ( just 5 weeks to the next race) I could concentrate on building "just" the body.
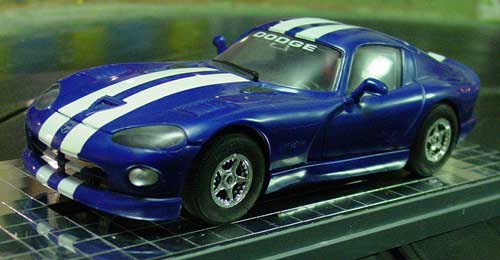
For starters I needed to find a 1/24 Viper that could serve as a baseline. I looked at all the available models (Maisto, Burago ect. etc., but in the end setlled for the old Carrera slotcar Viper. Although there were many flaws in the body, it had the right basic proportions and as it was a plastic body, a material I was comfortable with and used to work on.
First I set out to correct the major flaws, the side windows were way too big as were the headlights, of course the front splitter had to be reworked completely. The reccesed door area behind the front fenders on the carrera body was too shallow and the roof was too high. So I started with removing whatever offended me.
Grilles in front of the windshield were milled out, all the raised ridges round the windows were sanded flat, the resessed area behind the front fenders was deepened and the front splitter was sanded flush with the bodywork.
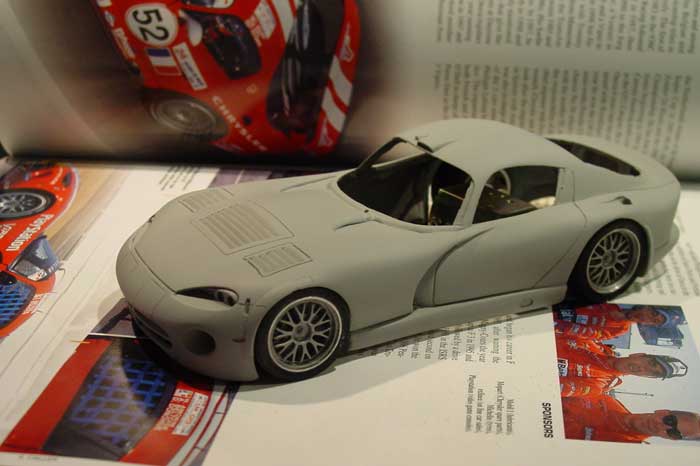
Next step was to build up the major shapes for which I mostly used Milliput and TAMIYA modelling epoxyputty. The fenders were widened to a true scale 81,5mm (Carrera body was 75mm) at the front and 82,5 at the rear. A roof scoop was added, side windows and rockerpanels were reshaped. With a lot off sanding, filler and endless checks against the ref pics slowly the general shape started to take form. Whenever I lost track of what still needed to be done I used a coat of Tamiya grey primer to check how the body looked in a "uni" color, I also used the primer as a "spray" filler to even out the hard to reach parts like the arera around the hood/windshield.
Unfortunately it wasn't until 2 weeks before I started to make the first pictures , by then most of the modifications had been done.
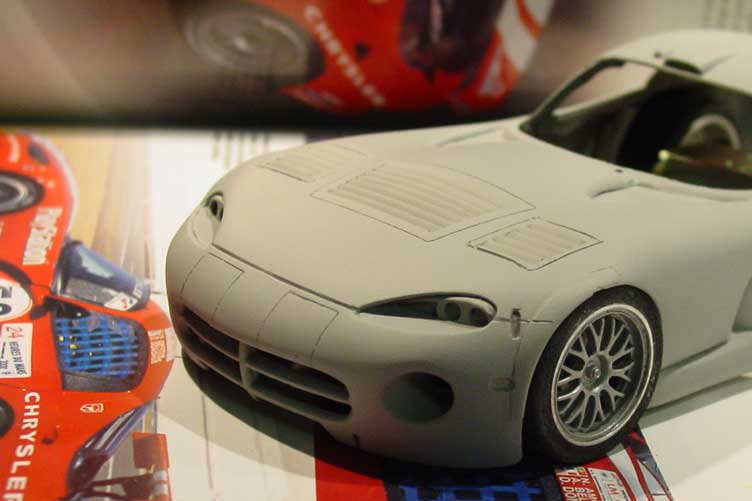
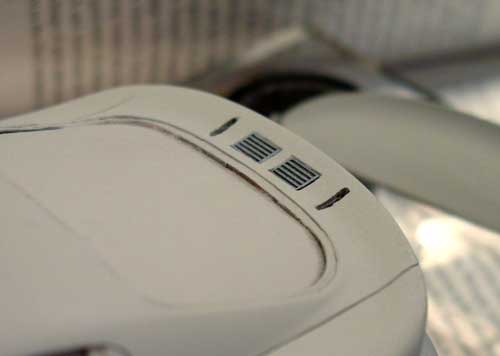
The Naca duct on the hood has been removed, new Naca ducts were milled on top of the rear fenders.
I also milled the slots for the exhaust pipes and the hood fastners, the intention being to detail these later with Scaleproduction PE fastners.
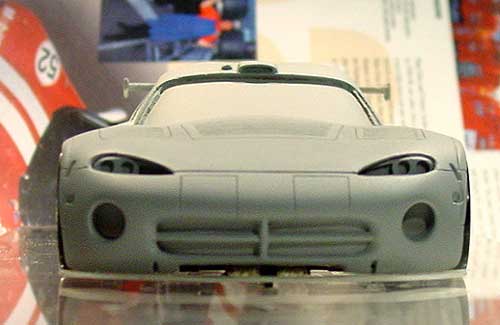
Headlights were reshaped and detailed with parts taken from the Revell kit.
For my first attempt to make new tunnels for the "lower fender" lights I used some plastic tube, but I wasn't satisfied with how these "blended" into the bodywork. So removed them and stuffed a big blob of miliput in the holes and started drilling and milling until I got the right "look".
Most difficult job was creating the louvres on the hood. These were first scribed along a ruler with a #11 scalpel and then milled with a Proxon and a very steady hand....yeah right...easier said than done.
After all that sanding and priming it was time to rescribe all the panel lines and the outlines for the 2 centre lights. I cut some templates so I would get a good simitry, only to find that as I swapped them to the other side.....the body wasn't as simetrical as I thought :( back to the drawingboard.
Two weeks later..the race was getting awefully close now and my team mates were getting a bit nervous (did I metion the Viper was going to run in a team endurance) as I still had to cast the mold, laminate the body, add the lights etc etc. So I started adding the last details to the master.
By now all the openings and the windows were closed with sheet styrene to prepare the body for the silicon mold.
I'd managed to improve the simitry, which with all those curves and swooping lines on the body was hard to get right....and in the end.. I didn't.
[
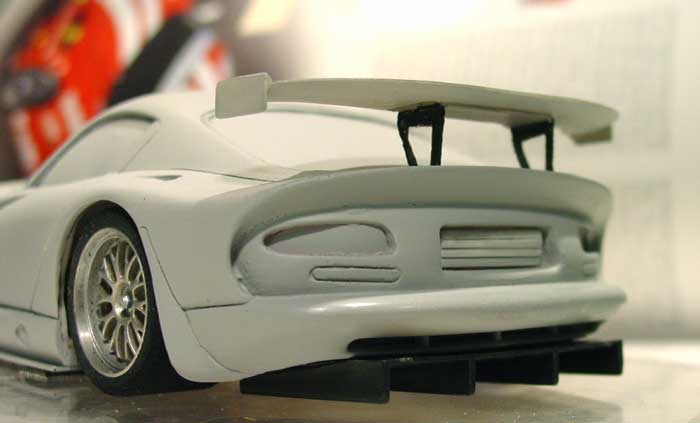
Work now concentrated on the back of the car. With the help of some good reference photo's (mainly from the Le Mans 24hrs yearbook's) the differential coolers underneath the spoiler and the exit duct/ grille in the back panel were added. I saved these small parts for last so their detail would not be lost underneath multiple layers of primer . 2 rectangular holes were cut in the body between the slots for the rear spoiler supports.The small radiators were cut to size from Porsche 962 oil coolers found in my "left over parts" box.
[
The differential cooler exhaust grille was scratchbuild by layering thin strips of sheet styrene on top of each other (like rooftiles).
The resin rear spoiler came from the Scaleproduction Viper kit and although actually 1/25 still looks in good proportion with the rest of the car.
The rear lights had been reshaped so tI could fit the clear lenses from the Revell kit, again these are 1/25, but for these small details the difference hardly shows. The diffuser came from an unused (I wonder why) Revel CLK GTR.
[B]Rear Spoiler[/B]
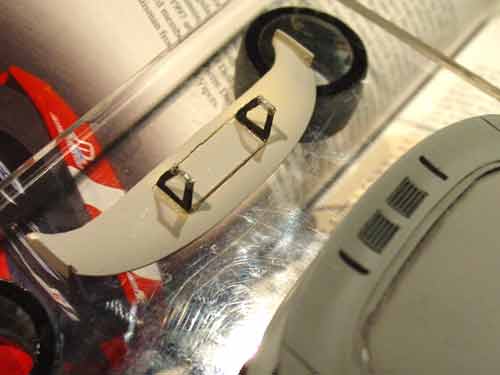
The Viper rear wing rests on these very thin twin supports, on the Studio27 and Scaleproduction kit these are nice but fragile PE parts. Not really suited for life as an "endurance" slotcar. (where you must make a pitstop to remount a lost rearwing).
So I needed something strong but with an "open" look. In the end I used 0.5 mm clear lexan to replicate the supports.
First I used a warm plier to bend a rough U shape bracket. Then I milled a rectangular recess for the bracket in the Wing. Mounted with with strong doublle sided adhesive tape (carpet tape) the bracket is flush with the Wing underside.
I then trimmed the bracket to the correct shape and just painted the suports black on the clear lexan.
Here's a detail shot of how the U shaped bracket is fixed to the rearwing. The whole spoiler support/wing combination is strong, flexible but still detailed to scale.
With all the details modelled to their "correct" shape, the Viper was shot once more with a light coat of primer and test fitted with the front splitter and sideskirts over the chassis to verify the correct wheel and ground clearances. Finally the Snake was ready to go for a swim!
|
|


