|
|
 Gents Gents
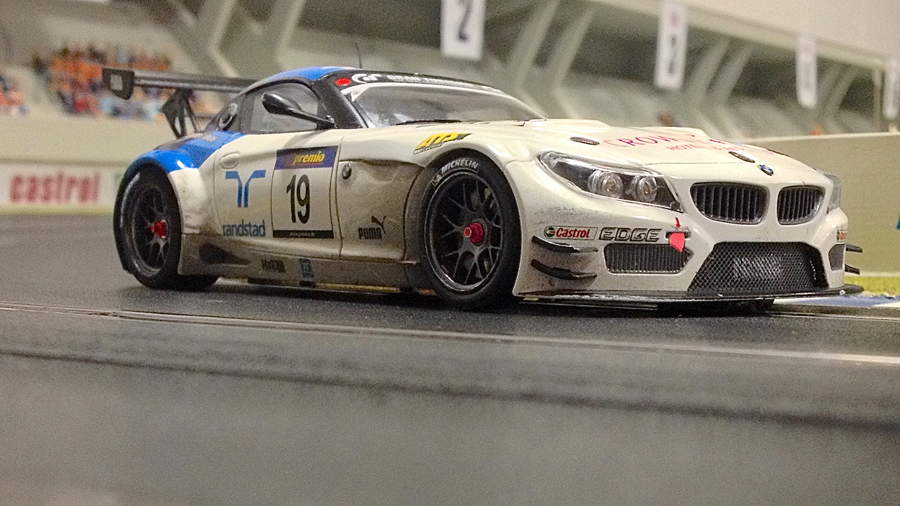
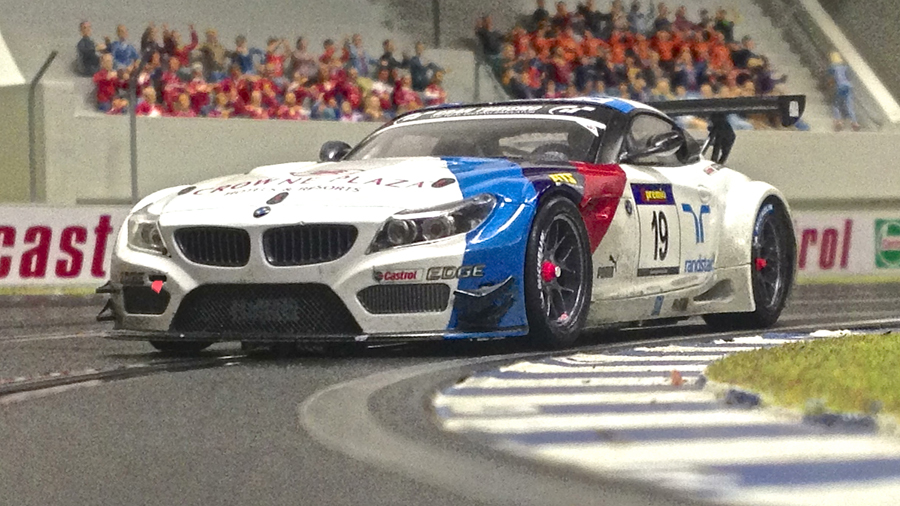
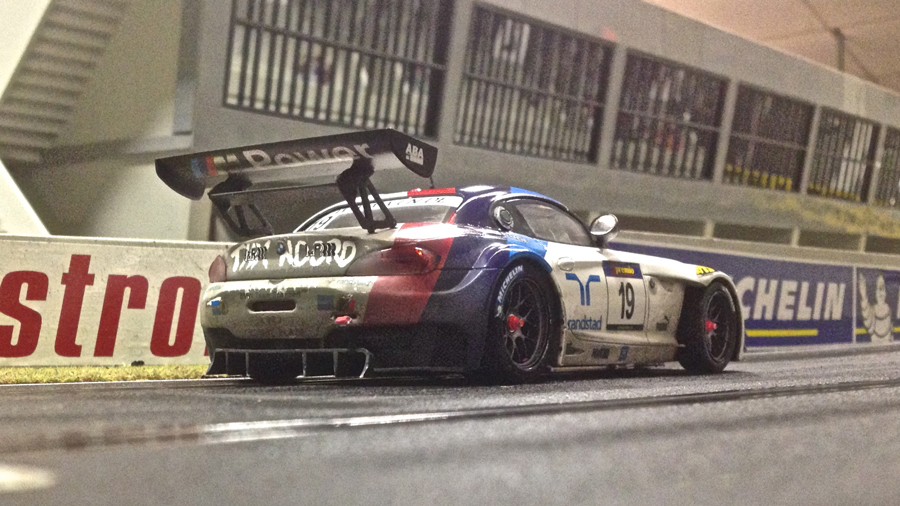
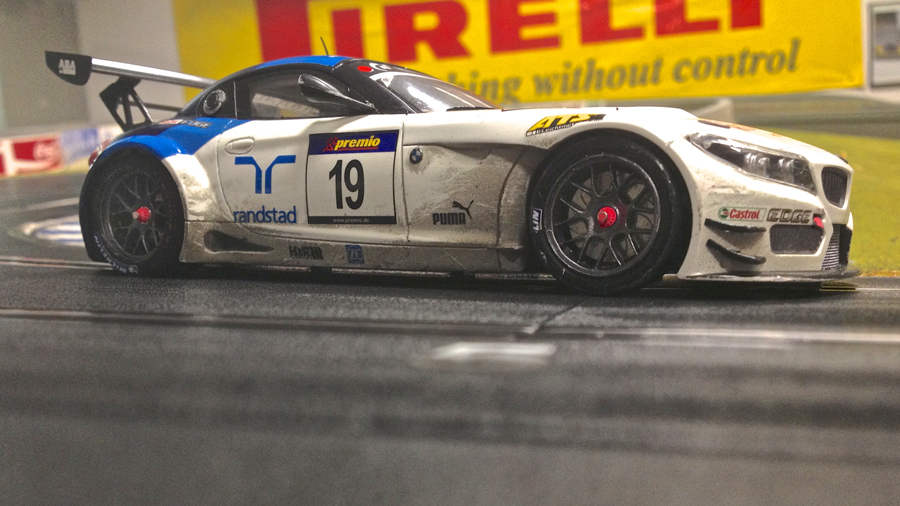
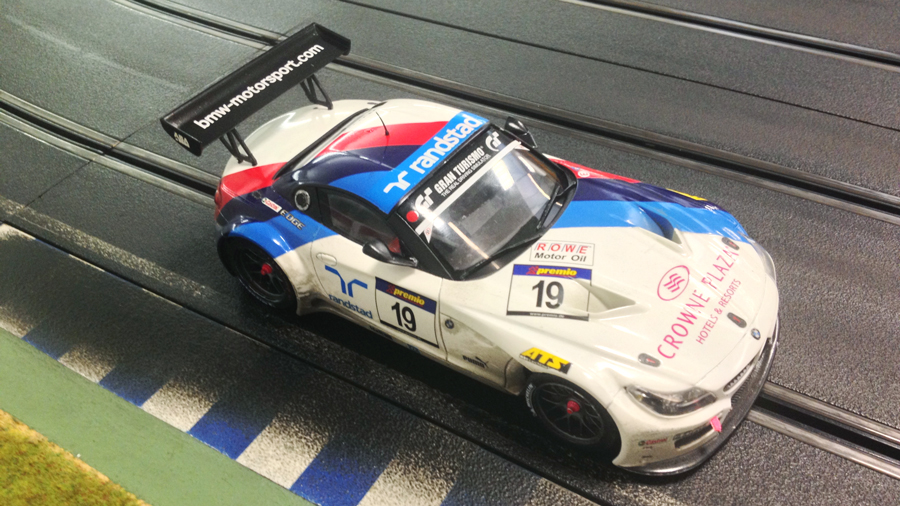
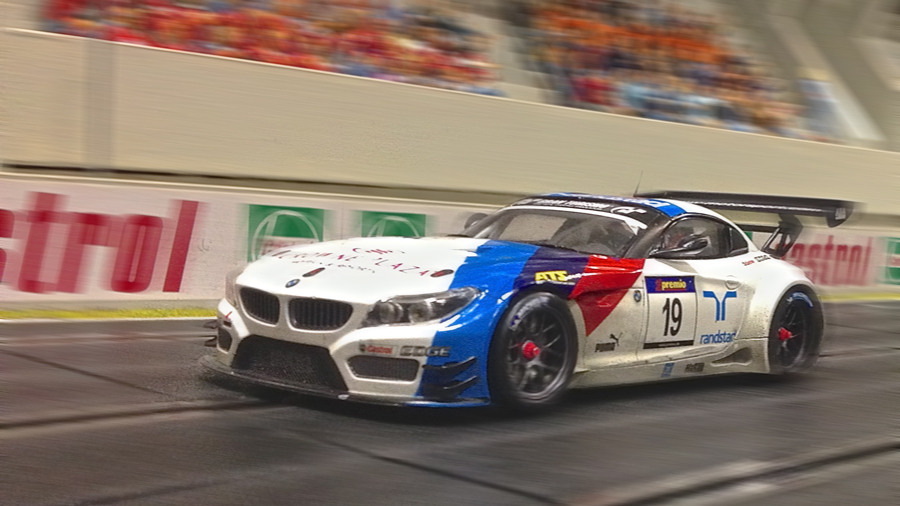
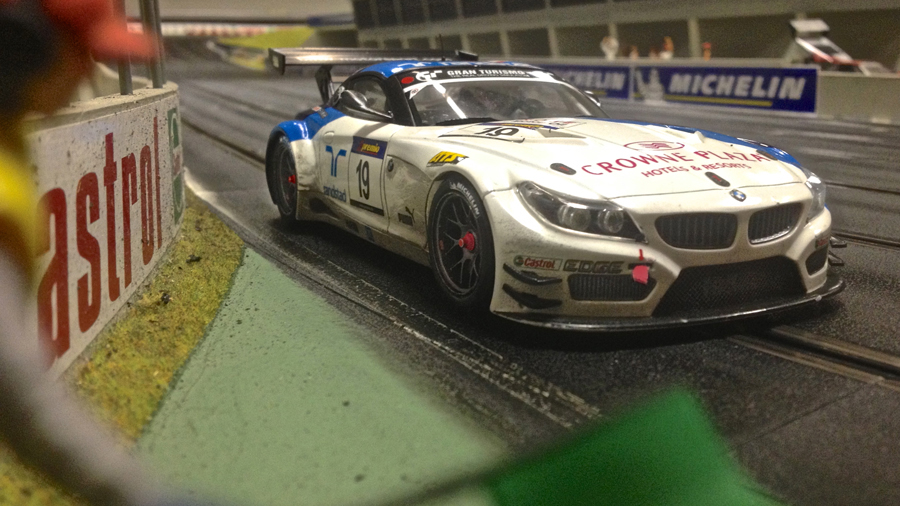
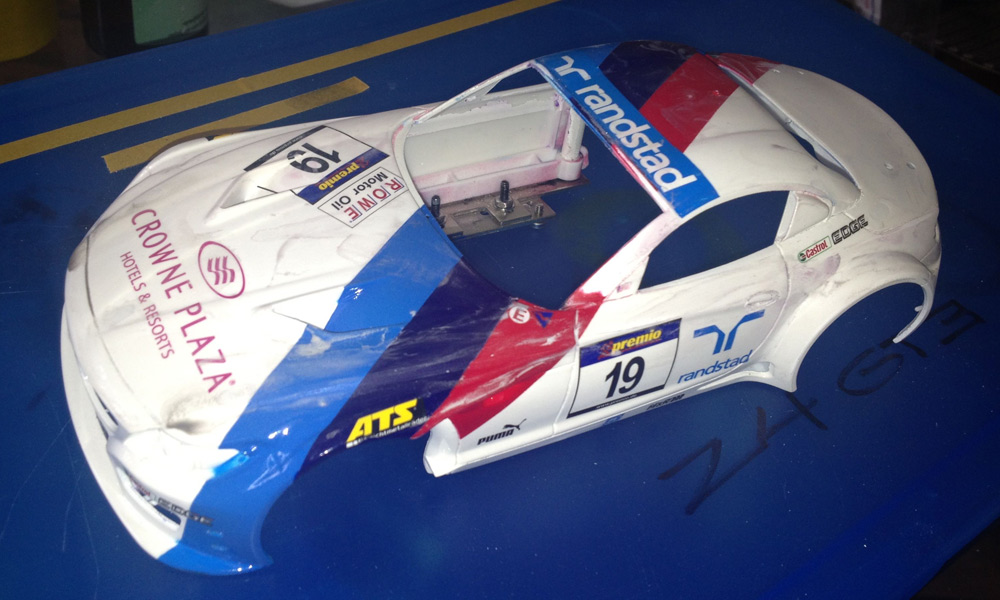
Here are some pictures of my latest Scaleauto, the BMW Z4 in 2013 team Schubert VLN livery.
A lot of detailing has been done to get the basic Scaleauto White-kit up to 2013 specs.
I will post more on how and what I did later on...for now I hope you'll enjoy the pictures.
Lets see how many differences you guys can spot compared to the base Scaleauto kit
with kind regards
Tamar
Its been a while since I started this thread. A question on masking a body in an other topic made me dig up these pictures I never got round to post.
But better late then never.
Ok for starters, for this kit I used a studio27 decalset, which is tailor mode for the Fujimi Z4 Kit which unfortunately differs quite a bit with the shapes of the Scaleauto Z4 slot body so those iconic BMW M striping would not fit.
And since the striping is made up of very specific and bright pigments, not a chance in the world to touch up the missing parts. So I had to paint the stripes.
Masking & Paint
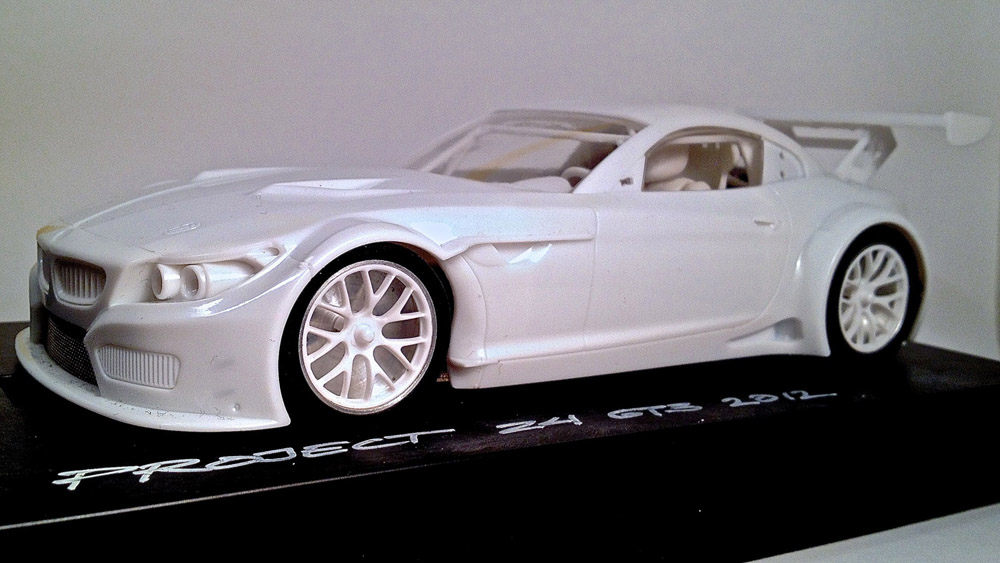
I'd done some body mods to correct some of the shape errors in the Scaleauto Z4 and gave it 2 coats of tamiya white primer as a base coat.
After I spray a base coat I usually seal it with a light coat of clear..the reason why will present itself a bit later on

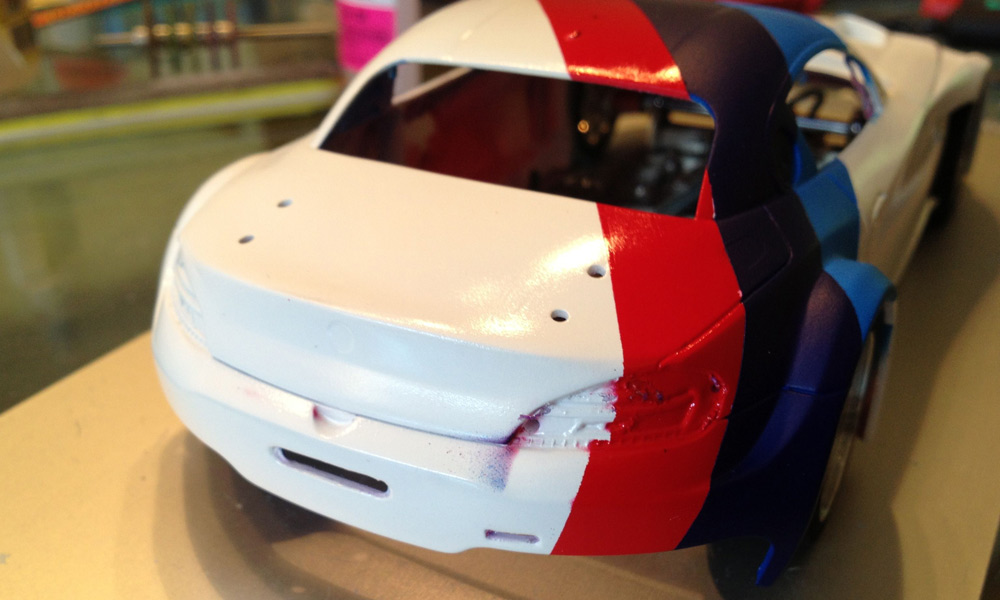
With the Striping running from the fornt left over the hood, roof and down across the left rear corner..its hard to define where borders of the individual bands need to be.
So I first masked the total width of the striping and gave the edges of the masking tape a light shot of primer to seal the edges.
I then masked and sprayed the Red color (Tamiya Italian Red) .
I then masked of the red to spray the light blue.again sealing the edges of the masking tape with the underlying color (white on the left, red on the right)
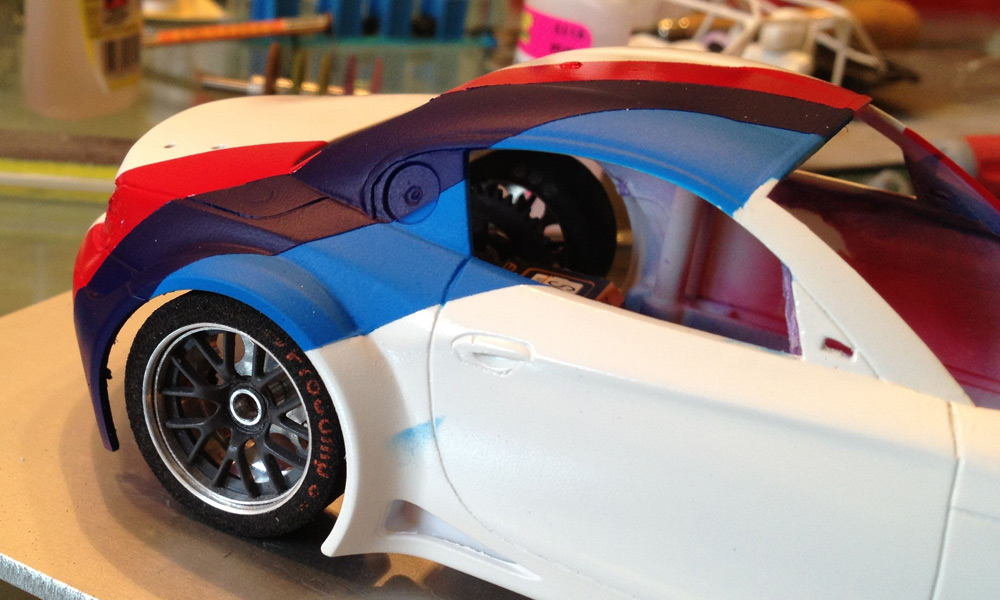
Then I sprayed the light blue. (Fas color light blue)
All that's needed after this stage is to remask the light blue for the dark blue, but you only need to seal the edges of the light blue mask. The dark blue will cover both the light blue and red.
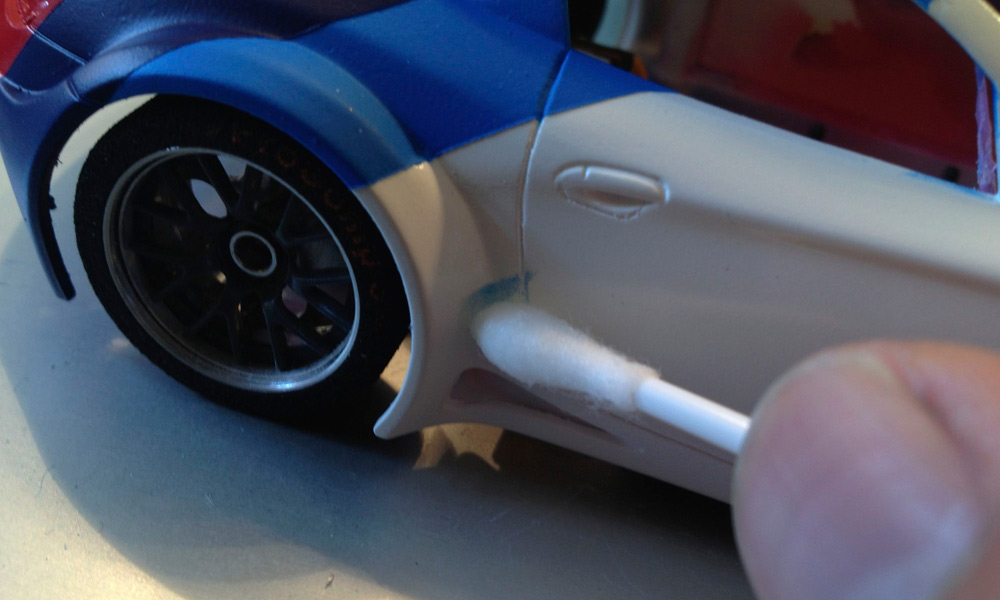
Now no matter how well you mask your car, you've always got that small bit of tape that comes loose, or other small overspray errors. This is where having a thin layer of clearcoat over your base color helps.
As you can remove/correct small errors easily with the tip of a cotton stick dipped in some cleaning petrol. The overspray will rubb off easilly without the risk of damaging the underlaying base color.
This was the first and most likely the last time I will use Fas color paint, the pigments were really nice, but I had to use a lot of paint, Maybe my airpressure was to low, but it resulted in build up paint ridges along the masking edges.
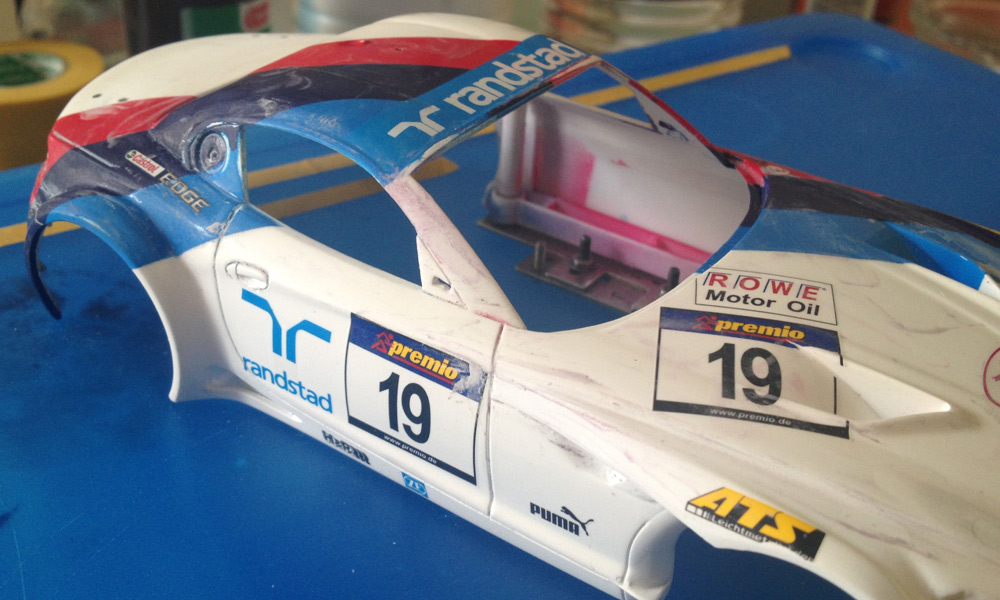
So I cleaned up the overspray and gave the whole body two shots of clear, and used 1000 to 2000 grit emmery paper to rubb down the edges of the painted stripes.
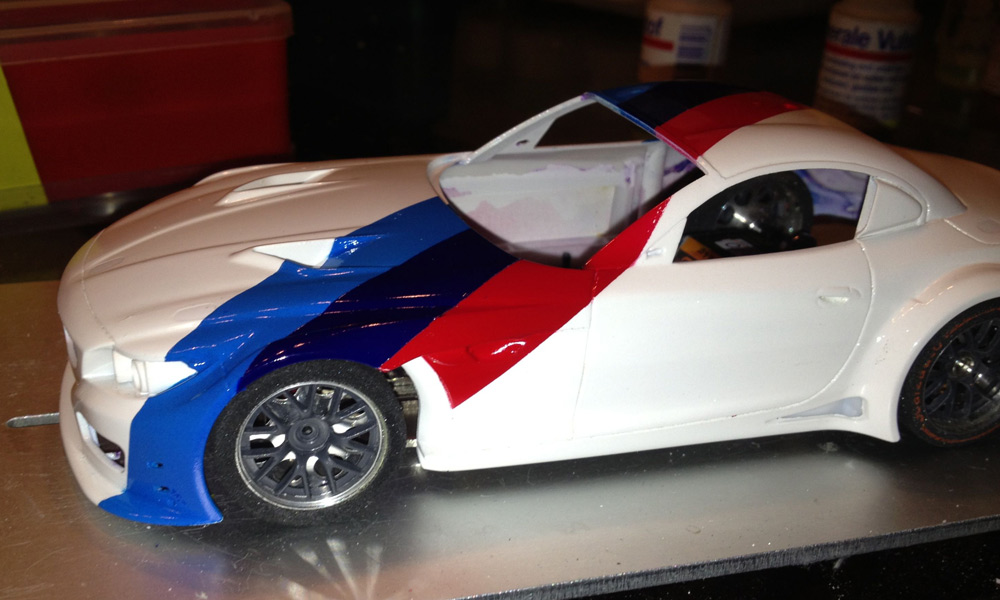
Then it was time to apply the decals which I sealed with two coats of clear. Normally that would be it, paint decals, clearcoat and then the final making for the matte black parts.
But after all these layers of clear, the sharpness of the body edges had been lost a bit while some of the edges of the decals and masking tape were still visible.
Sanding down excess Clearcoat
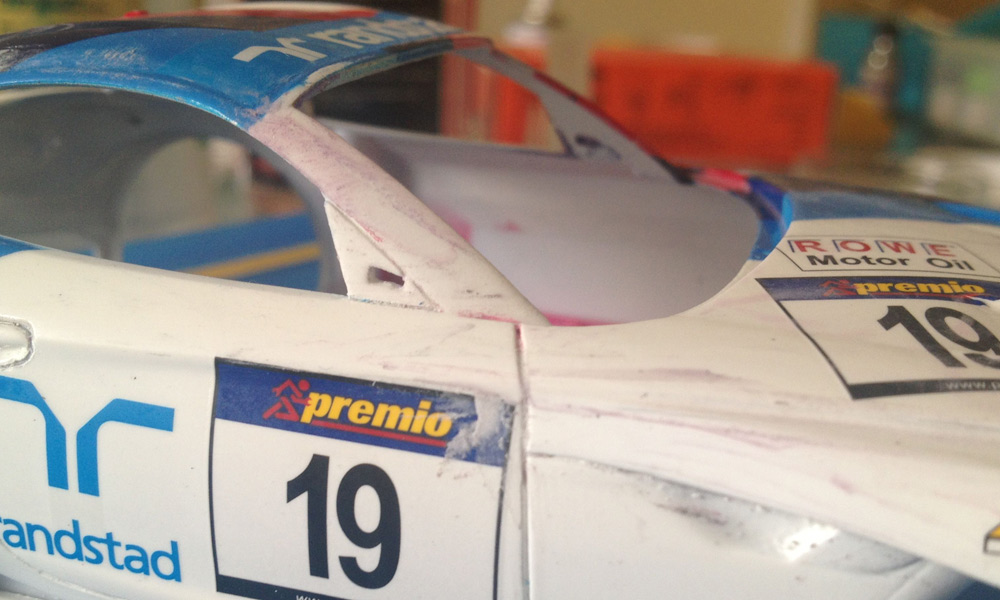
So I went one step further and carefully started to sand or better cut the clearcoat down with even finer emmery paper and a set of flexi files which range from 2600 to 6000 grit
These Flex-I-files are invaluable tools for these kind of delicate sanding and polishing jobs.

They have a sanding surface mounted on a foamboard backing which makes them just flexible enough to follow curved surfaces, but stiff enough to cut edges and smoothen flat surfaces.
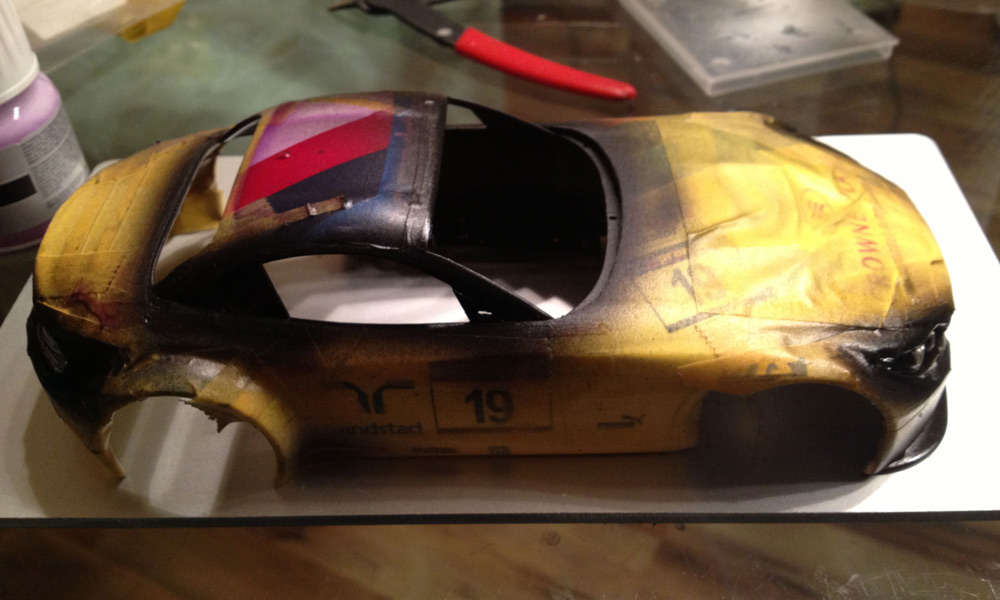
I must admit that when I started doing this there were times when I thought "whthfck are you doing" cause at a certain stage my shiny body looked like this...
...but I'm glad I stuck with it, just a quick rinse of the body with water confirmed that the "smudge" was just residue of the clearcoat mixed with some of the sanding surface of the flex-I-files.
As you can see in the picture below. That red haze is the residue of the 6000grit flex-I-file.
Obviously when you're sanding the clear coat you dont want to go too far and cut right trough the clear coat.
If you just want to clean up the edges of the body and the decals..that's where you concentrate your work.
Be gentle, and rince with water frequently to check how much more you need to cut back the clearcoat. The surface doesn't have to be 100% flush, even on a 1/1 car you'll see some difference where the stickers are applied.
After this final sanding stage I gave the body one last coat of clear. It is best to let this final coat dry and harden thouroughly for a couple of days before masking the body one last time to spray the matte/semi gloss black surfaces.
Masking and painting the matte black surfaces.
As in most cases, when I do a car, I did not have a couple of days to let the clear coat harden, so I had to result to my trusted hot air oven and backed the body for 2 hrs @ 70˚ celcius.
I then masked the body with the widest tape I had, taking care not to press the tape too hard on the body.
Why? Well first of all because sometimes when you have multiple layers of claer and paint the top layer may be bone dry and hard, but the underlying layers are still not fully hardened.
Press your masking tape too tight and it may leave indentations in the combined layers. (Learned that the hard way )
But even if it does, don't dispear, Yes you've just given yourselve a bit more work, but with a polishing compund you can rubb these marks out.
Secondly, you've spend all this time painting and decalling your car and even though your decals are now covered with a few coats of clear, its still just the glue of the decal that bonds them to the body. Press the masking tape too hard and you risk pulling the clear with the underlaying decal of the bodywhen you take the masking tape off.
(Learned that the hard way too)
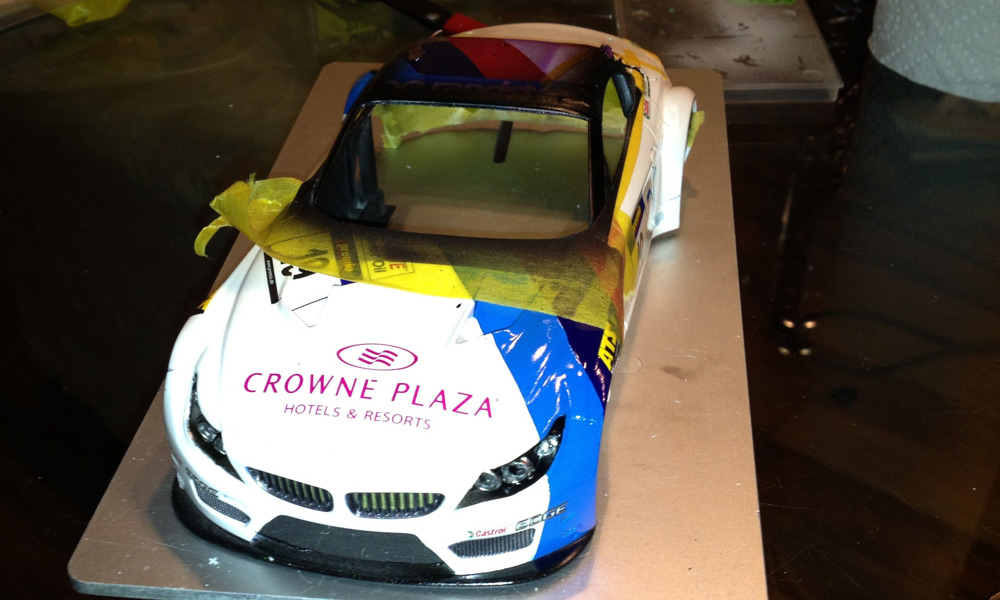
So here is the masked body after I sprayed the matt and semigloss black, broad bands of tape, loosely applied, and for the most delecate part (the roof with the full width Randstad decal) I used Humbrol's maskol.
This is a rubber masking liquid designed for masking model plane canopies. Which makes it ideal for masking transparant stuff like lamp lenses and windows.
But I also use it as insulation on the wires for the lights, much easier and lighter then shrink wrap.
The only downside of this stuff is that it ruins your brushes, no matter how well you rinse them, some of the masking fluid always remains.
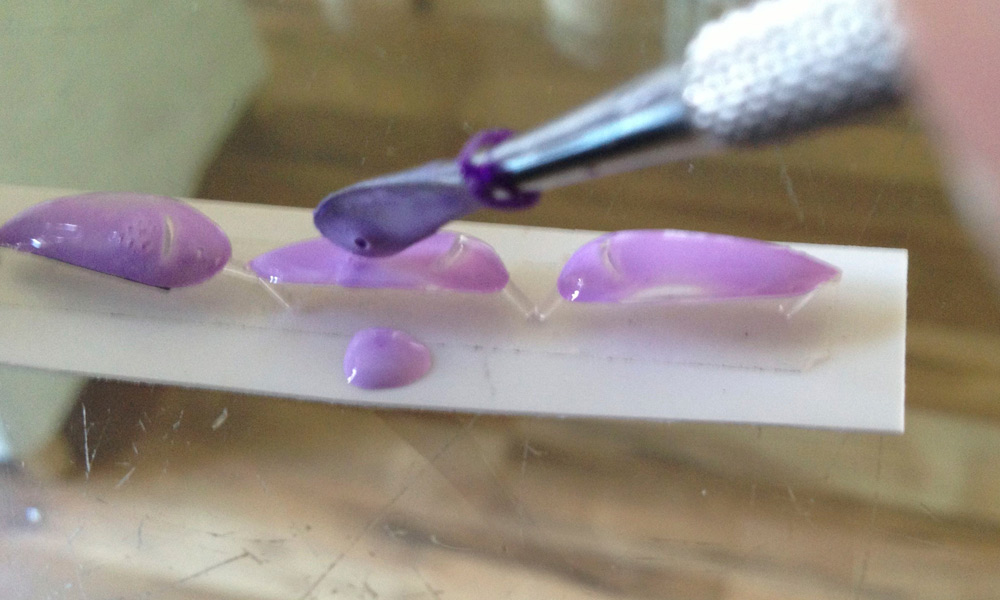
So here I experimented with applying the masking liquid with a spatula..and guess what...worked like a dream

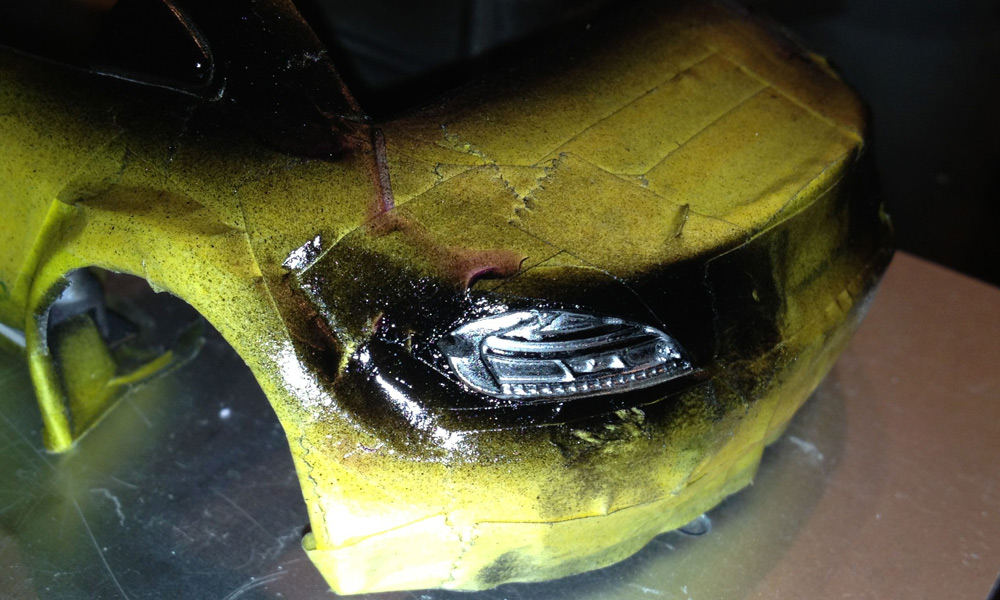
Final stage, almost there, I used gloss black for the head and taillight clusters as a base for the alclad chrome I applied with a brush to highlight the details.
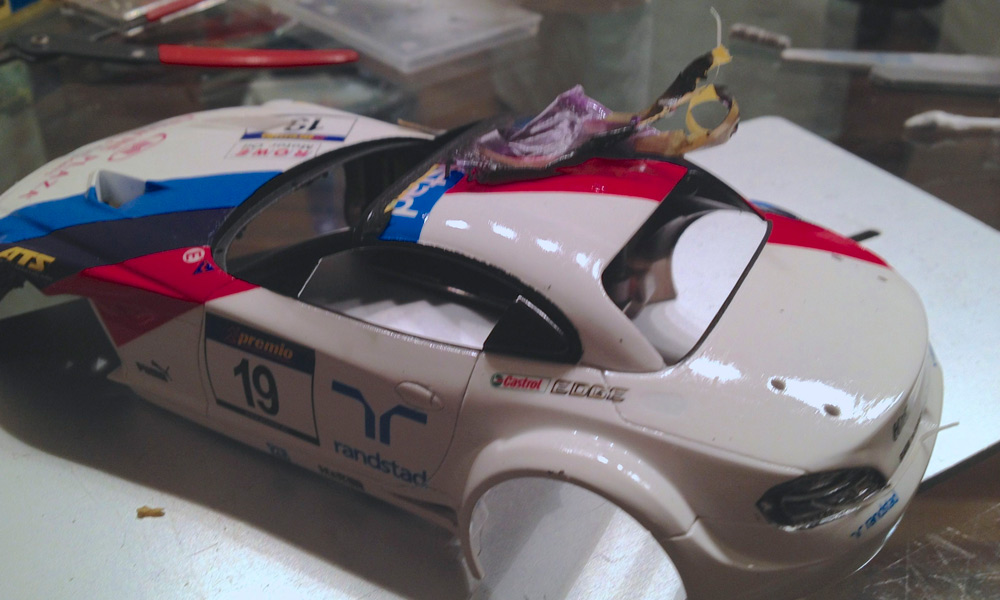
And now after all that work.. time to unwrapp the car. When removing the masking tape, be gentle, dont pull the tape straight up.
Peel the tape back over itself so that you're removing just a small part at a time
As you can see the dried maskol can be rubbed off with ease.
And here to ther were some small errors in the masking, but these to were easilly corrected.
|
|