|
|
 One of the most recurrent challenges for a sportscar modelracer is that there's no kit of the racecar he wants to build. But if you can get hold of a road version it is no so hard to covert such a kit into a proper racer. For those of you all that want to build a F430, I thought that these text and pictures might be helpfull. One of the most recurrent challenges for a sportscar modelracer is that there's no kit of the racecar he wants to build. But if you can get hold of a road version it is no so hard to covert such a kit into a proper racer. For those of you all that want to build a F430, I thought that these text and pictures might be helpfull.
Base kit is the Revel 430, not only is is cheap and sturdy, but with a little imagination you only need a few modifications to turn the street car into a proper f430 GT2.
First Step is to find some good reference pictures so you know what the differences are compared to the road car.
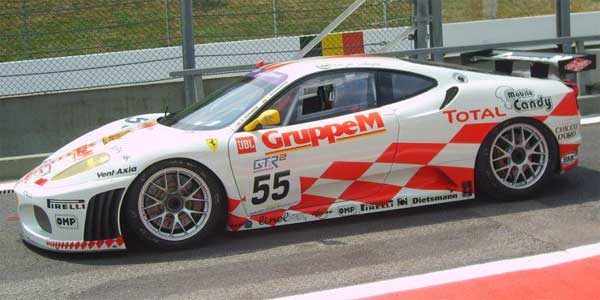
I build this 430 for FIA GT races at the 2006 IMCA worlds. My team had been scheduled to run this #55 Gruppe M car.
Second step is to see which kits there are to start from, I found 2 kits avialeble for the F430, one from Fuijimi and one from Revell. Question was...which one to use...
Luckily my good friend Google always comes to the rescue. Other modellers might have done such a project and their experiances can be really helpfull.
While looking for som pictures of the modelkit I stumbled onto this german site : http://free.pages.at/igm_modelcar/bausatzvergleiche/f430/04.htm
It was really helpfull as this gentlemen had written an article comparing both kits.
 
He came to the usual conclusion... Fuijimi has more detail ect etc. But as my F430 was not going to be a static kit but an endurance racer, I decided that the thicker one piece body of the Revell kit would be better.
Time to make a list of the modifications that needed to be done. Found some good reference pictures from the first test runs of the F430 GTR
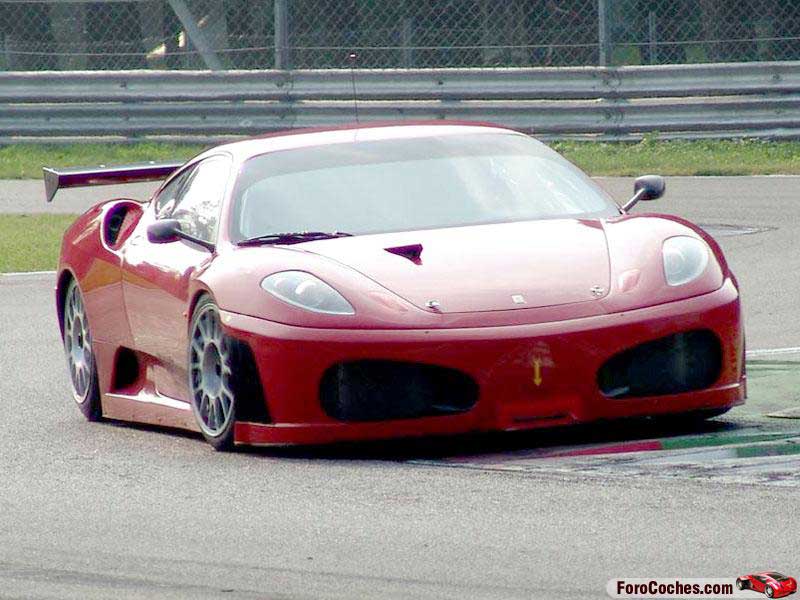 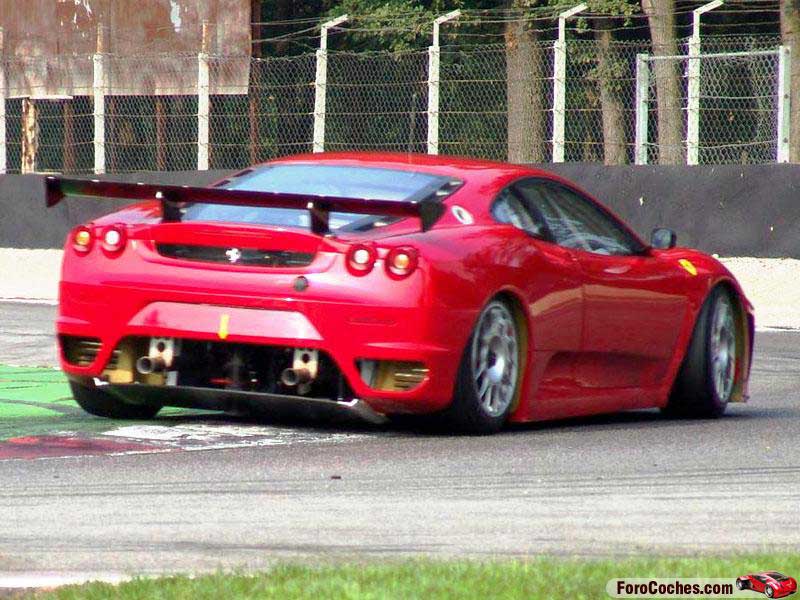
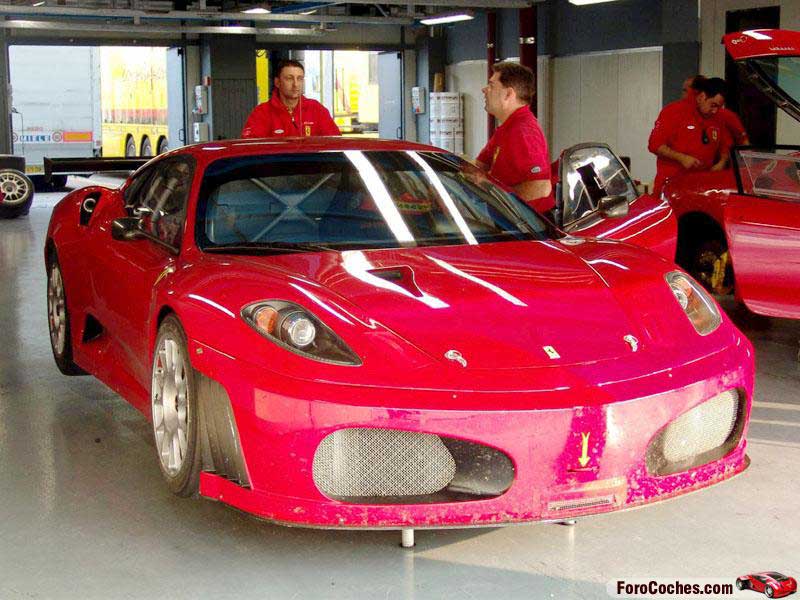 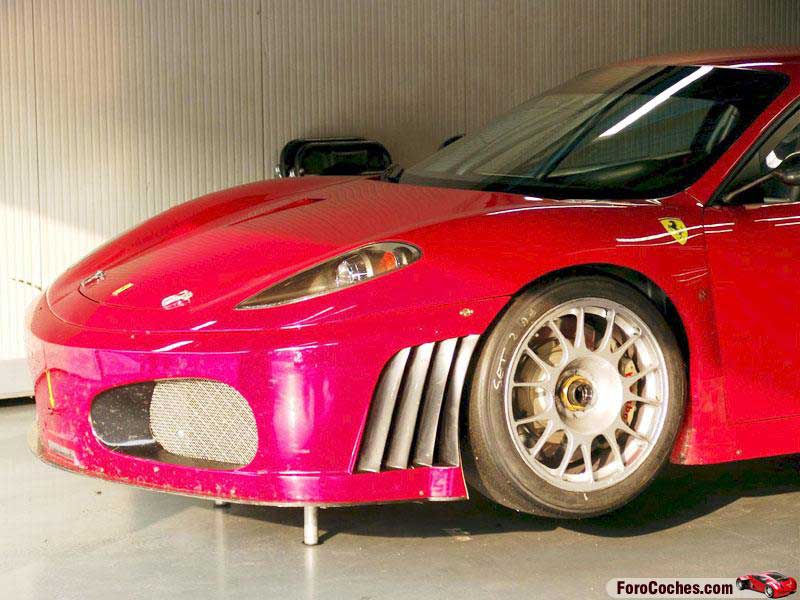
Most obvious is of course the need for a rear wing, this would have to be sourced from an other kit (no need to build that one), then there's no longer a gap in the frontbumper, this will have to been filled in and a splitter lip needs to be added. naca duct on the hood should not be too big of a problem, but then there are those "gills' just forward of the frontwheels...hmmm that could be a tricky job, and a fragile part too. Then there are the lower skirts on the side and the more "open" rear with the 2 exhausts relocated to just above the small diffuser.... well let start working.
As we also had to make a "slotrace" interior, finding out what space we had left above the chassis was a priority. So we started with extending the
Side skirts as they would give us the correct ride height.

To extend the skirts I first glued 2 strip's of plastic on the inside of the body (for support)
There's a very helpfull edge in the revell body that will help you to glue this straight and horizontal.
Then I added 2 more strips on the outside that would be the extentions.

Closing the central hole in the front bumper needed a different approach. This part would have to be strong as it would recieve most of the force at an eventual crash. Putty is not an option here, nor is a piece of sheet plastic. In the end I just put some tape behind the hole and used cyanoacrilyte and
Ca filler (glassbubbles) to close the gap. It was a quick and dirty solution, but it was strong and easy to sand.

Same sort of plastic strip was used to extend the front bumper ( pic her seen after first coat of primer) Naca duct still has to be milled in the hood, again no pics of this proces, but it was a reasonably straight forward job. Cover the hood with some Tamiya masking tape. Draw the shape of the naca duct on the tape and cut. Use a Dremel or Proxon the mill out the shape. You "just need a steady hand" its easy..at least it looked easy when Mr T did it!

Next step was to fit the rear wing, looking at the ref pictures I found that the wing from the Carrera C6 would be perfect for the job. The distance between the wing supports more or less matching with those seen on the 430 GTR.

So I cut 2 slots in the rear window frame for the wing supports.
Here it helped a big deal that this is a seperate part on the Revell kit. It made checking and shaping the slots a lot easier.
Spoiler from Carrera Corvette is an easy fit and looks like the real thing


The modified F430 with Side skirts and frontsplitter cut to right size. Endplates of the spoiler still need to be sanded into the correct shape.
With most of the external modifications done we could now start working on the interior. Using the Lit parts was not an option as they would make our car way to heavy.

In the Hotslot factory mr.T. had already experimented with making vac formed inetriors for his Aston project so I started to make a similar master for our 430. And as we were at it we decided to vac form the windows as well.
Unfortunately we did not take any pictures when we actually build the masters but in general I modified the kit interior by lifting the floor, to make room for the motorwires, and higher chasisparts.

A closer look at the interior. I added the seat and a driverfigure as well. this was a bit of a gamble as we had no idea if this would work well during the Vac form process. The for the doorpanels and dashboard we made seperate mouldings. The interior now pictured with the four parts glued together: dashboard, the two doorpanels and cockpitfloor and rear firewall.

Much to our surpise and pleasure, forming the interior wit the driver and seat at once turnded out really well.
The driver's arms and the helmet were resin casts as these were to complex forms for the vacuum technique.
Top part of the seat was done seperately as well, here a piece of styropor foam was a good and light solution.

Now we had to finish the car to IMCA concourse standards. The 430 GT2 had to be a copy of ars that raced at the FIA GT Spa 24 hours off 2006. In a small committee we choose the Gruppe M F430. I like white bodied racecars (easy to spray) and with red Gruppe M decals (courtecy of Mr T) it looked just fine.
The window, for the driver to get some extra air when needed, was made of simple lexan waste. My wife was really astonished when I was cutting the lexan and looking at a picture of the real car.
Lats but not least, the engine compartiment, is a vacuum version made by of our good friend Big Al. Thanks for that, you helped us well.
So this F430 GT2 is actually became a three men development project.
This car was raced by Holland II at the IMCA nats in Barcelona. It ran fine and we maneged to win our GT2 Amateur class in the "Eurepean round" of the races.

To bad I didn't make more pictures immidiately after the car was finished. As you can see, it was not without a fight... some race accidents have scarred the nose.

After some time I thought, there was still some hardware missing. It needs exhaust pipes and real lights to be complete. Foor the IMCA nats the light were not necessary as there was no night shift race. But how do you make exhaust pipes that resembles the real thing? I am so to say somebody who loves to use recicle materials. Maybe we can do a quiz. What do you think the used material is for the exhaust pipes? I mean the material with which the pipe was supported?
a. Lexan
b. Plastic
c. Heineken tin
d. Carbon plate
e. Energy drink tin
Reply on this article and I will place the right answer.

The back and front lights burning!

From Amoslot I used a specially developed lightningset with breaklights and flaming pipes. The system has a chip with software. In the test it functions well, for some time. Great breaklight and the flames came in two short shocks (per break). I think the software ran mad after a few minutes of driving. I may need some help of Inabnit Light Consultancy. Maybe some more about this in a new topic.
As you can see, I still need to raise the headlight covers.

I like to see cars that ran with the lights on, even at day-time.

As you can see its not that hard to modify a street kit into a proper FIA GT racer......
....it gives you lots of fun till the early hours....enjoy your F430 GTR like I do mine
Henri van Gool, with many thanks to Tamar
Henri
|
|


